

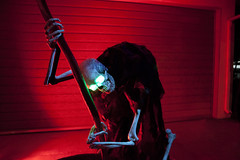
I took pictures and measurements the last few times I made a cauldron creep. My creeps have been based off of the dimensions of the "Bucky" anatomical skeleton. If you have a costco/walgreens posable skeleton you have to make adjustments for the length to arms legs and torso height.
What I have managed to assemble here is the diagrams I had made for the neck mechanism and cauldron motor.
I tried to make them clear but you know how sometime you either over think it or because you know the subject so well you skip over important things. If you have question I'll try to answer them.
Here is the parts list for the cauldron motor assembly:
10” to 12” section of 3/8 in. W x 1/2 in. H Aluminum C-Channel with 1/16 in. Thick
2” to 3” PCV end cap
2 1” x 1.5” x 3” length of oak, walnut, or other hardwood
2 1” x 1.5” x 2.5” length of oak, walnut, or other hardwood
12” to 18” diameter circle of wood, mdf, or particle board
Plumbers Tape 3/4 in. Galvanized Steel Hanger Strap
ATX power supply from computer (option 2)
1 ¼” drywall or wood screws
3” drywall or wood screws
Here are the diagrams high-res and easier to read tehn screenshots on a blog:


The motor assembly in the cauldron. It consist of a windshield wiper motor, using the low power inputs from a 5.5v power source ( I use an ATX power supply from an old PC). This drives a piece of 3/8" U channel aluminum with a 2" PVC end cap bolted to the end. This is a cup that the stirring rod rest inside of. The stick is not attached to the motor base. To ensured that the stick doesn't bind while turning the PVC cap is filled with hot glue or a round insert of cardboard is placed inside. Sharpening the end of the stirring stick to a dull point will allow it to turn fore freely as well.
To make modifying or servicing the motor assembly or cauldron easier I have created a sandwich style construction. The motor is attached to a round cut out that rest inside the cauldron. It screws or bolts through the cauldron itself into a base underneath which has an "H" shaped riser to clear the ground and allow a pipe for fog and electronics and lights underneath.


Here you can see in pink that sliding rail system i devised for adjusting the creep in relation to the cauldron. It seems in practice you might want to make it longer and cut down to size instead of coming up short.


Again I'm short on time for blogging but I can answer questions so leave them in the comments.
I'll be working on the neck mechanism and update as soon as I can.


Awesome work! Thanks for taking the time to share!
ReplyDeleteYou are so wonderful for sharing this. Makes it so much easier. Thank you!
ReplyDeleteThis comment has been removed by the author.
ReplyDeleteWhat is the current source ATX?
ReplyDeleteDid you ever put together a kit for this?
ReplyDelete