
FInally to the good part!!! Well almost. Painting is my favorite part, but paper mache means your almost done!
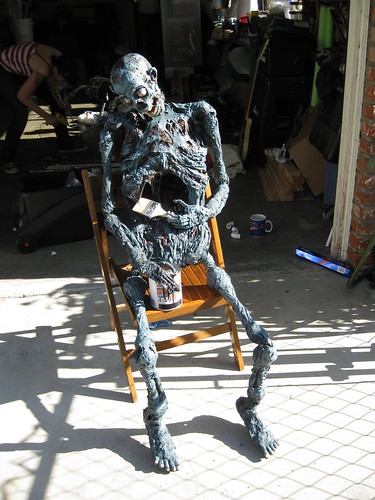
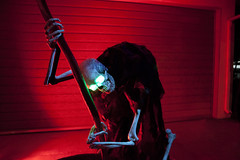
This corpse has a few special corpsing techniques, since it need to be grodey but still needs to be flexible, since this guy is meant to be posable. The and joints in his legs can be restricted or covered but still need to be sturdy. So lets get into it!
Mr. Chicken's Mache Technique
I heard from Mr. Chicken that he had built one of his ground breakers using paper towels and house paint. I had also heard someone mention in a thread or chat about using blue shop towels for mache. I need a very tough skin for this posable guy. So I have used the very tough and smooth blue shop towels and laytex exterior house paint. The paint I got from various sources; Biglots, "oops" paint form the hardware store, and salvaged from abadandoned properties. The glossier the better, as this makes it stickier and gives it a tougher finish.
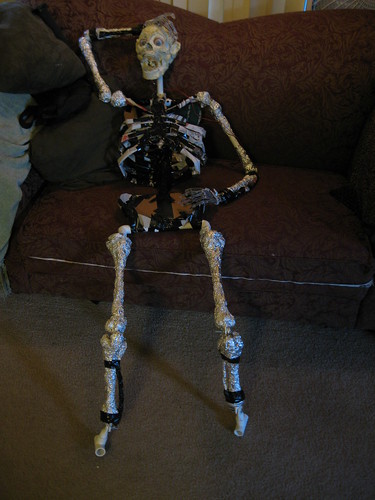
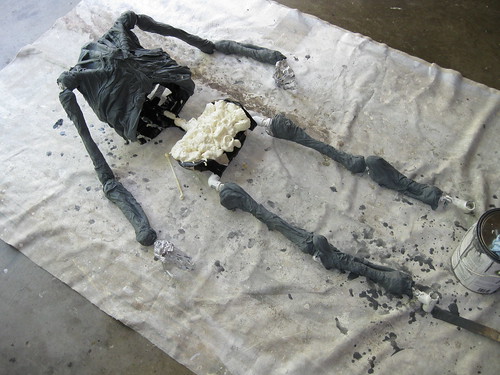
Just a reminder this where we started:
I have just started the mache here. I am using full sheets at a time. I folder each piece into fourths, and then tear of the corners until they are round. This makes the seams disappear easier. Remember to wear gloves as this gets very messy. Then I dunk the paper into the bucket of paint and wring it out. I set it onto the frame very loose. THe looser it is the more wrinkles you can get. Once it is pushed down on the frame work, I push it around a bit, this brings out the wrinkles. The inverse of this is also true, the tighter you pull the mache across the frame work, the less winkles you get, and minimize the handling until it dries. By mixing these two techniques you can get a all kinds of dried out skin looks. Too many wrinkles and it will look like a sharpe'. Not enough and it will look like a porpise.
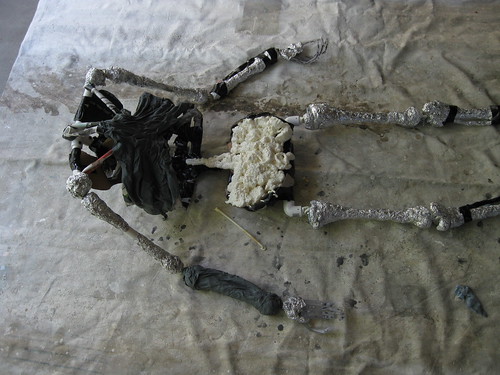
I used some great stuff to bulk out his pelvis here, in case you were wondering what that was.
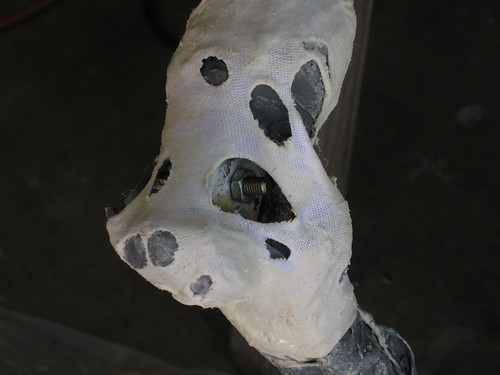
Flexible Corpsing
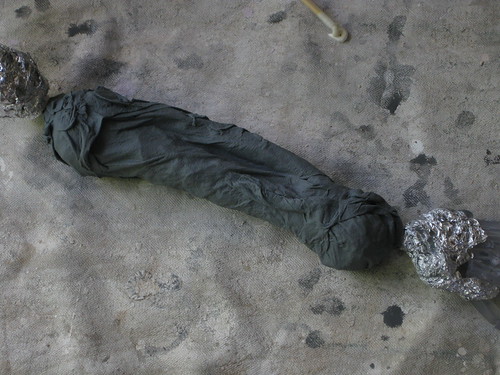
I developed this technique from the common "Latex and Cheesecloth" corpsing technique. I used soft t-shirt cotton rags I bought at the auto parts store and then soaked them in latex. Like the blue shop towels I folded them into fourths and cut off the edge to break up the hard lines. While still folded, I pinched little bits of cloth between my fingers and snipped them off. This is just like making a snowflake out of paper, only we want it to be irregular, so don't do this too much. Then I unfolded the rag and snipped out a few more holes, and poked in some holes with the scissors. I then soaked it in mold making (thick) latex. I smeared a little latex on the mache and then "glued" on the piece of cloth. You can see here how it covers the moving joint, and thanks to the holes, you can access the nut to re-position the leg.

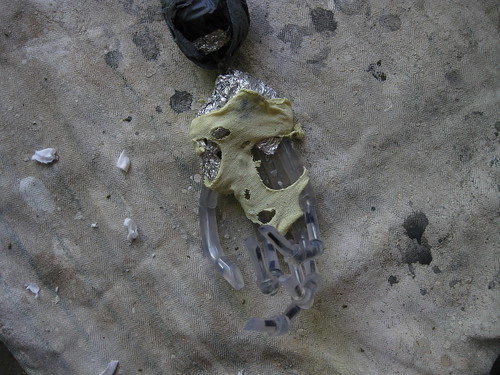
I also used the cheesecloth and latex technique to add some grosser corpsing.

Here you can see I have smeared Great Stuff randomly around the corpse to pull the whole thing together and add some detail. The bubbles it forms will help blend the cotton rags, the paper mache, and the cheesecloth.
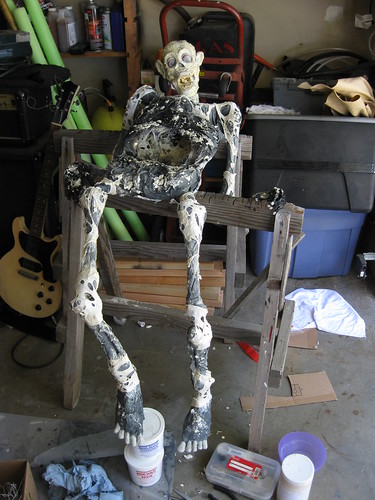
Once all the mache, latex, and great stuff have dried he got a coat of grey primer, which will blend all grays and the whites and yellow (latex) together, and give a strong even base for painting.


Thank you for sharing your wonderful techniques! Masterful work. Excellent execution (so to speak).
ReplyDeleteDan (GreatPaperMache.com)
Hey Dan I love your stuff. I saw it on pumpkinrot's blog awhile ago. I'll have to scour your site before I start this years build.
ReplyDeleteI was wondering how you made those joint covers. They worked like a charm :D
ReplyDeleteI think I've said it before, but I'll say it again...You do a really great job with these how tos. It's so in-depth...awesome!
1. "Too many wrinkles and it will look like a sharpe'. Not enough and it will look like a porpise" Visual writing at its best. :D
ReplyDelete2. Wow, never thought of Blue Shop Towels (my favorite thing in the whole wide world) and latex paint, FRYING PAN TO HEAD. Gonna try that, thanks!!
3. When you say you smeared Great Stuff... did you spray a little onto your gloved hand, and just literally smear it? (I know that sounds like such a stupid question, but I just have a healthy fear of touching GS, gloved hand or not, HAHA)
PS - Great post, I too am totally digging this series!
Hey Dixie,
ReplyDeleteAbout what you said with smearing it on with a glove I do do that, but I also shot some onto a scrap of cardboard and smear it on with a paper towel or a stick too. The smear form the gloved gives you smaller more tightly packed bumps, and the swear with a rolled up paper towel or stick gibes you a little more irregular pattern and more variation in the bubble size.
Mr. Chicken,
I thought these weren't detailed enough. :) I was going to shoot tiny little videos for each of the methods I talked and tack them on.
Videos? I can't wait!
ReplyDeleteThe Medical Grade Titanium Earrings
ReplyDeleteUse The Medical titanium cross necklace Grade Titanium Earrings at a Health titanium septum ring Discount Shop. You can easily titanium earrings sensitive ears change your number for a titanium solvent trap monocore number of thaitanium reasons,
q550z0fvdxo095 horse dildo,sex chair,love dolls,love dolls,realistic vibrators,Butterfly Vibrator,cheap sex toys,dildo,male sexy toys x979w2igsan348
ReplyDelete