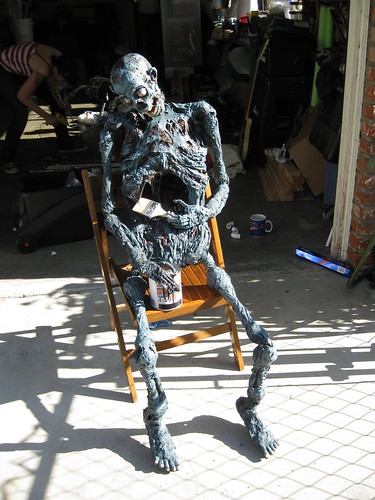
(as someone pointed out, he's got em by the neck, and I have him by the balls.)
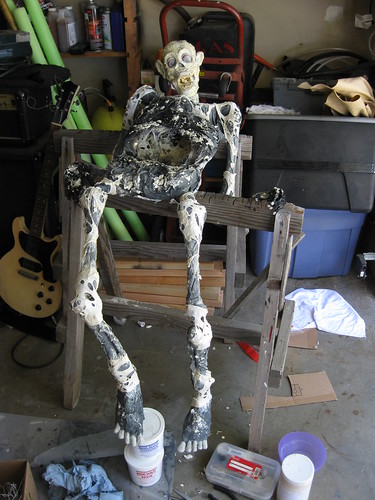
I built this corpse as part of a trade with the infamous Mr. Chicken in 2009. I made this body from scratch since I needed to fit some specs for the Chicken. It needed marionette arms and posable legs. I used arms like I had made for Cauldron Creep, and then I borrowed
a great idea from
Beelce, one the net's brilliant haunters. More about that in a bit.
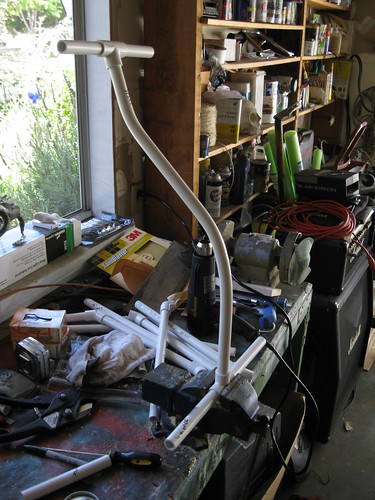
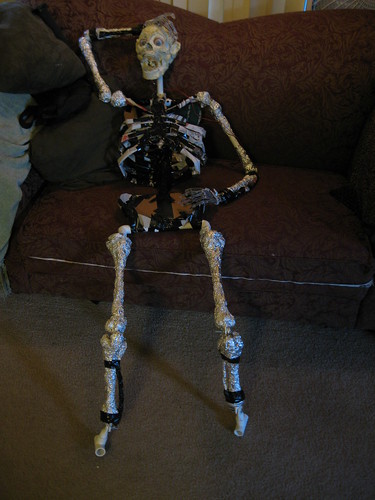
The Armature
If you have been haunting or even interested in haunting your yard for a year or so, you probably have heard of or come across the
zombietronix skeleton calculator. It is a great free tool and I use it all the time. It tells you what length to cut PVC to represent different bones, and tells you how much pipe and how many fittings you need to make your own pvc skeleton armature.
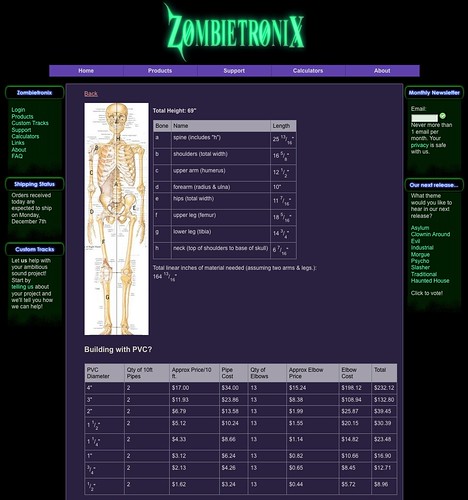
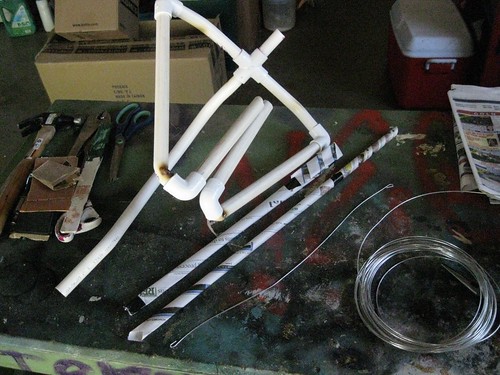
I started here with the general dimensions of the corpse, I put in a value for an average height of 5'9. I measured out the pieces of the 1/2" PVC and labeled each section so I would remember what they were once it was all cut up. I used a PVC cutter to make quick work of the pipe.
I started forming the spine first. I set the spine segment with the pelvis and shoulders attached so I could grip it in the vise. I used a heatgun to slowly heat up the PVC in broad sections where I wanted the pipe to bend smoothly. You can tell if you overheating a small area as it will quickly discolor to a brownish green and start to bubble. Keep making long slow passes on each side of the pipe and push gently with your other hand, the pipe should start to give slowly. You want to heat it up just enough to bend. Overheating it means you have to wait longer for the pipe to cool and you'll have to stand there holding it in the shape you want even longer until it cools. I have found a way to "quench" the pipe. I used a small towel soaked with cold water and rub it along the pipe gently (so I don't deform the now soft pipe). This works very well and allows you to work more quickly.
Then I assembled the rest of the pieces. Now stop here for a second and go read
Beelce's Spawn of Articulation how-to. I forgot to shoot pics of how I made the legs, but I see no reason to show his how-to as my own. I made did it a bit differently than he did, I used the heatgun I had, and the vise to clamp down the ends. Seriously, go read Beelce's how-to and comeback!
The Ribcage
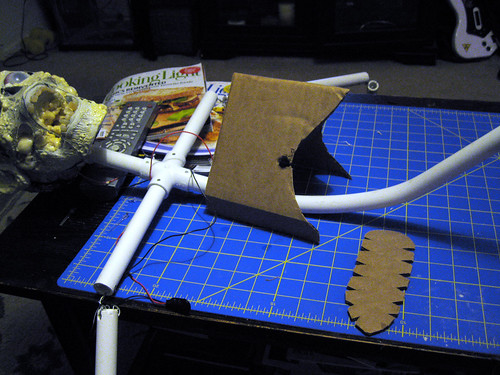
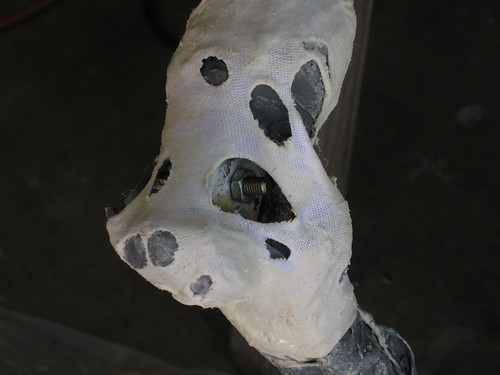
I made a support arch to put the sternum on and hold the ribs in place. I am using newspaper ribs, and I don't want them to get crushed. The support is attached to the PVC with some hot glue, and the sternum piece (with teeth) is hot glued to the support arch. I used some duct tape here and there just for added strength.
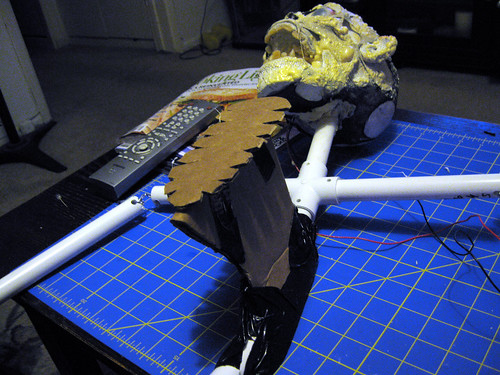
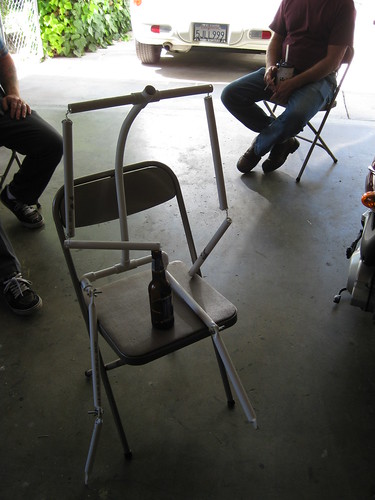
Look here and notice that I have taken the PVC of the shoulders and bend it with a heatgun. They looked too broad and unnatural. The measurements you get from the Zombietronix calculator represent the shoulders of the skeleton that include the collar bone, shoulder blade, and the top of the arm bone in an upright and correct posture. The shoulder piece should be cut shorter as it only needs to represent the shoulder blade and collar bone. I found in making 4 more corpses after this one that they should be quit short, to give the right look when making a corpse. The withering of the body collapses the stature of the skeleton, so the arms come in more at the shoulder.
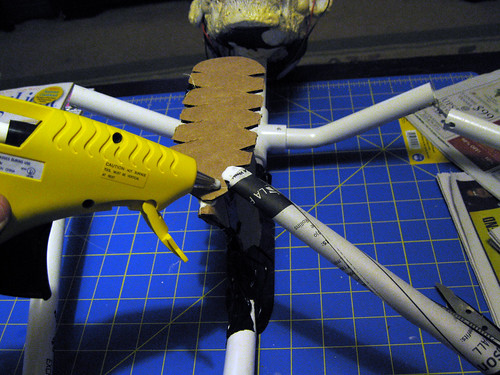
You'll notice I cut teeth into the sternum piece so that newspaper ribs (just newspaper rolled up into a tube and the ends cut off) would slide over them. This step is not needed, just make sure you have the same number of ribs on each side. Another tip here is as you are going, make two of each of these cardboard parts like the sternum, the support, shoulder blades, etc. and save the other one as a pattern, since once you have a full sized corpse, you'll want another and another.
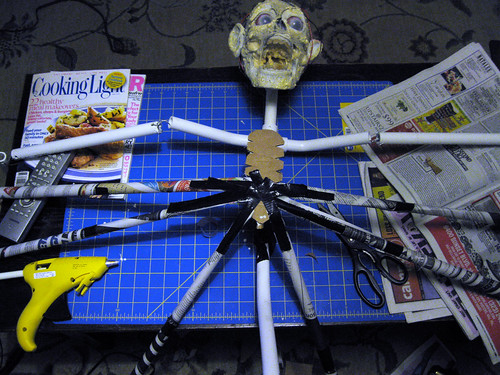
Here you can see I have taped up the ribs as I go. I have hot glued them on and then added tape to hold them in place as the glue cools and to reinforce them. I will attach all of them to the sternum first before I start wrapping them around to the spine and attaching them.
I have bent the ribs around to the back and hot glued them and duct taped them in place. I sized each rib as I went, just eyeballing the distance and shape. I have made two changes to how I do ribs since this projects. I now run a piece of bendable wire thru each rib so that it will hold it's shape. That makes this step easier, and removes the need for the support inside the sternum. I also have a chart I made from measuring a bucky's ribcage, and I drew a chart for which rib is which length. When I roll the newspaper I write the rib number on the rolled paper and cut it to length. Just a quick diversion to show how these better ribs go together.
Roll some newspaper and cut it to length. You can see here the ribs in their component pieces, finished rib, tube of newspaper, and wire with hooked ends.
Run the wire thru the tube of newspaper. Use some needle nose pliers to bend the end of the wire. This keeps the paper from sliding too much but mostly keeps sharp pointy wires from stabbing you or poking thru the rib later in construction.
Bend the wire end again with e paper. This just helps to make the end of the rib studier. You don't want it to tear off after you have glued it.
Then wrap the end in duct tape. This will make it much more durable during the hot gluing it to the sternum.
Repeat these steps on each end of the ribs.

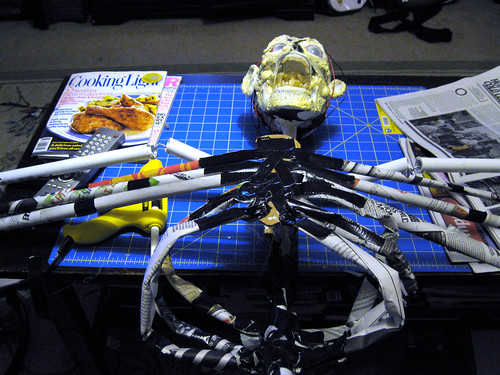
Once all the ribs are on, I added a collar bone of rolled up newspaper. You might think this is a "meta" detail, but it provides a support later for the paper mache so that the top of the chest cavity doesn't look like a big caved in hole.

I made some shoulder blades out of cardboard and hot glue and duct taped them on. These fill out the back areas so there aren't any big empty holes back there either.
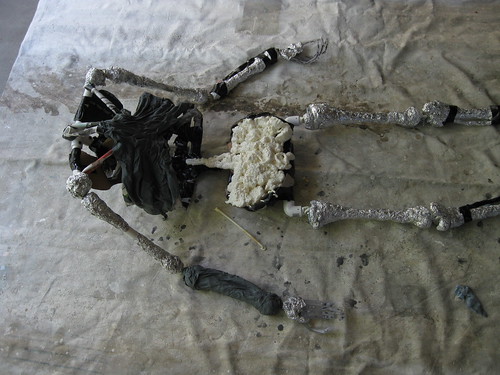
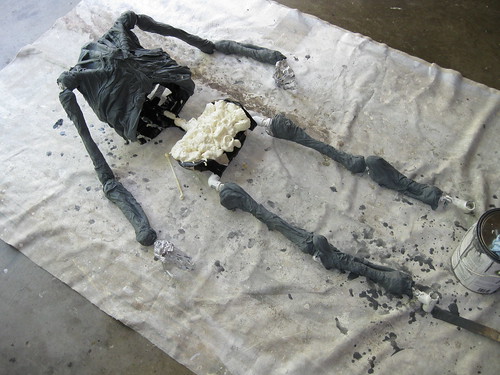
 The Limbs
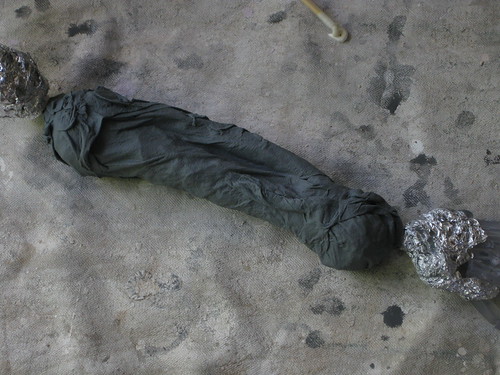
I started bulking out the PVC arms with some aluminum foil. This gives you a better looking arm, breaking up the shape of the pipe and allowing for more realism once covered in mache. The foil is just wrapped on, and any loose spots are touched up with a spot of hot glue.
I have bulked out his legs and added a cardboard pelvis.
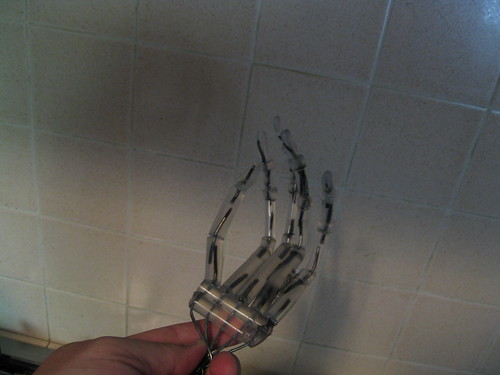
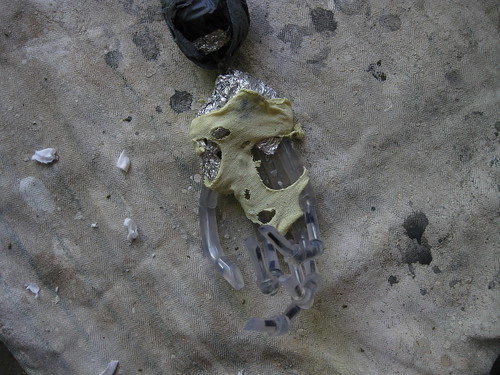
I made some hands out of hot glue sticks and armature wire. I wanted them to be posable, and they were but I don't like this solution. They were hard to paint and hard to pose. I made a new hand design based on a an idea from BoneDancer.
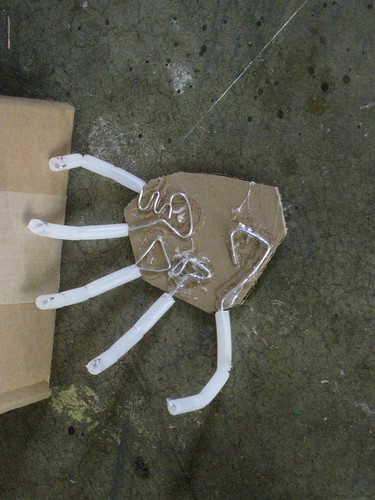
I cut out a palm from cardboard. I measured out some fingers from cheap ($.007 a foot) poly vinyl tubing using a jig I had made which was modeled off a real hand. I then ran some wire thru them. I bent the end around the tube at the fingertips and then I filled the end of the finger with hotglue to set it. I bent the other end of the wire into little semi-circles and hot glued those to the cardboard palm.
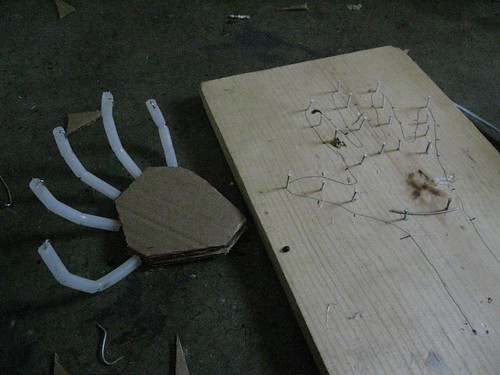
I closed the hand with a matching piece of cardboard and hot glue the whole thing shut. Here you can see the jig.

Then I used rolled up aluminum foil to bulk out the back of the hand. I have even made little tips for the fingers with little foil bits shaped into cones. That looks great when paper mached.
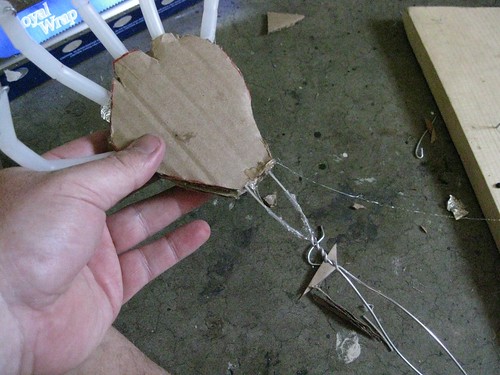
Then to attach the hand I made a loop of wire with one end like a fork, and after covering the fork end with hot glue, I slid it into the little tubes of the corrugated cardboard.
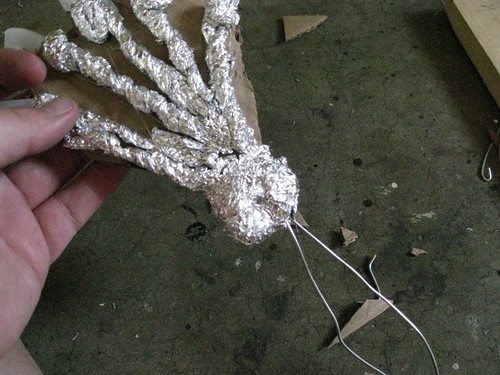
Then I bulked it up with aluminum foil to look like the wrist bones. The loop slides into the PVC arm and is secured with a squirt of GreatStuff expanding foam. For Mr. Chicken's corpse I just attached the hands to the arms with a small loop of string (marionette style, remember?)

The feet are made in a similar manner but are much more simple to construct.

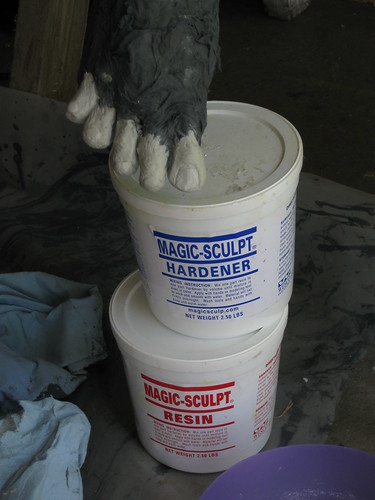
After the Mache I sculpted toes with some epoxy clay.
In the next segment I'll cover the paper mache and corpsing techniques I used on this guy.