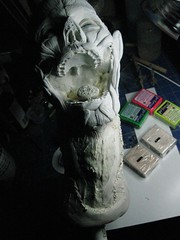
The fourth prop project this year that is NOT FOR MY haunt, and which annoys the hell out of my significant other is this guy. The Faceless was made for HauntForum's Joker, Shane Pitts who is doing a
charity haunt in Texas for Habitat for Humanity. He had asked if people could donate things like old scrubs or whatever and when I saw it was for Habitat for Humanity I thought I'd jump in and help (having been a habitat for humanity supporter in the past).
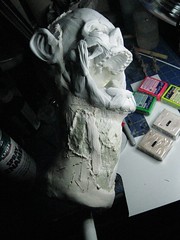
Now I'll say it first. I am bastard for getting things done at the last minute. But this guy should arrive on friday, the first day of the haunt. Please don't f**k it up UPS! This guy is going to get bolted to a headless mannequin body. Man it's hard to try and think about how things should fit together on something you can't see and touch, but I added some extra neck so Shane can saw him to fit. I hope that works out.
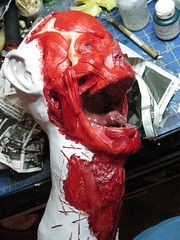
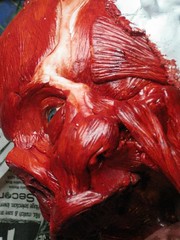
This is hands down the goriest prop I have made. It was fun to make even if it's a bit too much for my haunt. I like gross, and I think I have
proven that in the past, but I also like the magic of undead creatures, if that makes any sense. The gore of this prop just speaks to the reality of mankind. We can be very savage to each other and theres no magic in that, but that's also the terror of it, it's realness.
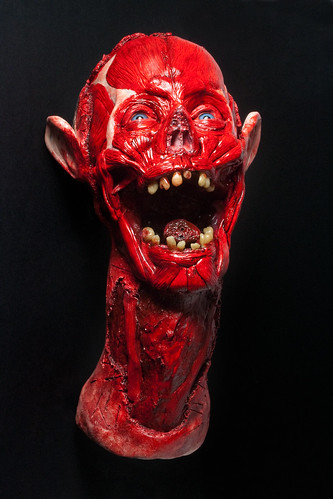
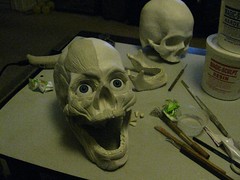
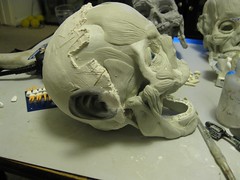
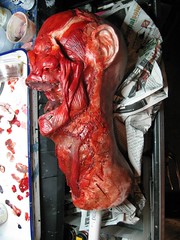
Here is the finished product. Gruesome eh?

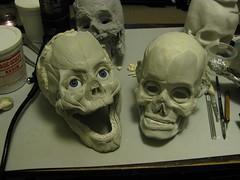
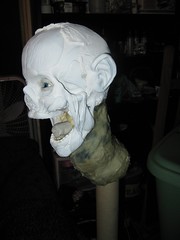
Here are some shots from the side.
I wanted this to look like the inmates in
The Asylum had gotten to one of the doctors (of whoever it will be, maybe the warden?) and had tortured him. Broken and pulled out teeth, the nose cut off, and the tongue cut out, and the face cut off. I didn't want it to look too surgical, so I made a bunch of cuts, to try and make the surgery seems cruel and frantic.
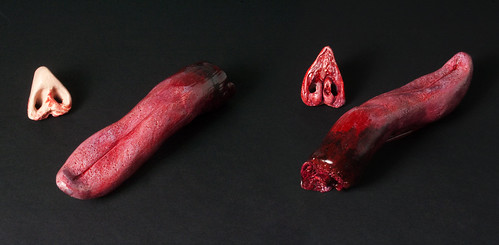
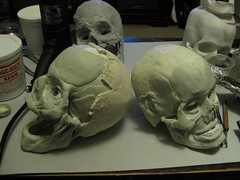
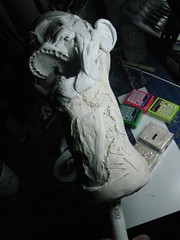
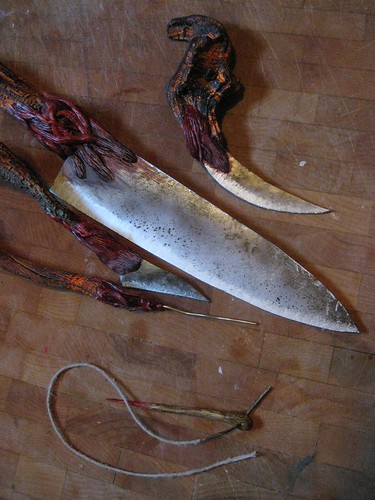
Here are a couple little bits I made to pose with the prop. This just shows the fronts and backs of each piece. I ran out of time but I had wanted to include the torn off face.
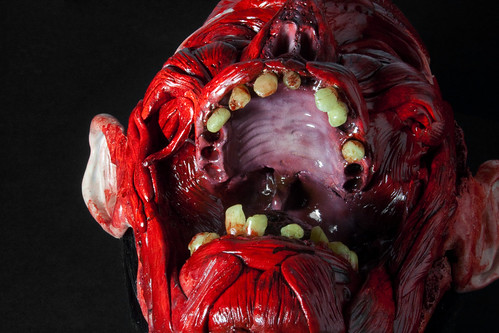
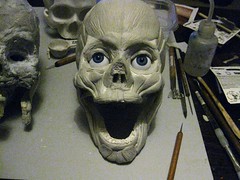
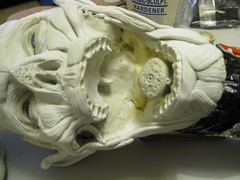
Here is a shot of the detail in the mouth. I used my airbrush here to try and give it a tissue like feel. I would have liked to go nuts on the detail, but I was running against the clock and had to ship this guy.
I have a few pictures of his construction but I haven't really made a how-to for this guy, just because he was made so quickly. I'll be doing a how-to on muscle and these broken teeth, so stay tuned for that.
Materials list:
Muscles: magic sculpt epoxy clay
Eyes: Hong Kong eyes from e-bay
Teeth: Sculpey brand translucent
Ears, Tongue, and nose: Super Sculpey III
Skull: Foam copy of customized Lindberg skull
Skin: Creative paper clay
Neck tissue and substructure: Smooth-on Plasti-Paste

First I sculpted half the face in Magic sculpt and referenced pictures of anatomy on the internet.In the most basic sense, I copied the muscle shapes onto the skull and then drew lines into it with a needle like tool. Nothing fancy there.
I then mirror the first side I did onto the other side. Looks almost happy, but we'll fix that soon enough.
Then I put on the Creative paperclay. I used paperclay because it lets me crate much more subtle textures than the epoxy clay. I used a slightly damp hog bristle brush to gently push in some skin texture. I then used a rough wire brush tool to mess up the edges of the skin, and an exacto knife to cut away chunks and make gashes.
I used duct tape and great stuff to fill in the jaw. On top of that I used some more magic sculpt to make the soft palette and the tongue stump.

Here I am bulking out the neck with plastic grocery bags and duct tape, and then covered in layers of foil to give it a grippy surface. The neck support is a piece of 1/2 inch PVC pipe.
In this shot the is still uncured, but I have used Smooth-On's Plasti-Paste to create a hard plastic shell on which to build the paperclay that will go on the neck.The texture was good enough to use as ripped up flesh so if you look at the finish product, I have just painted it read, and there are only two tendons sculpted over that.
Here is a shot of the paperclay build up. You can see the yellow of the Plasti-Paste showing thru.
Here I started roughing in the color. I am going to recommend this color over and over so get used to it. Liquitex liquid acrylics "acra scarlet orange". I know orange you say, but this looks like fresh "cut my hand open again" blood.
The bone is Liquitex "parchment" which looks great and by awesome coincidence, when mixed with the acra scarlet orange makes a perfect skintone which I used on the neck and ears.
To bring out the detail in the muscle I used Alizrian Crimson Hue and Phatlo Green mixed together to give a darker dried blood look to shade the lines in the muscles. I used this as a thin wash and traced the edge of each muscle and then brushed it over the ends of each muscle and let it flow into the grooves. I also used this color as part of the bruising colors on the skin.
The hair I cut off a cheap halloween wig and applied using latex mixed with acrylics to match the skintone. I applied it in rows, starting from the bottom and working up, with each new row covering the last rows ugly edges. At the top of the head I airbrushed some transparent back to blend in the edge, and dry brush some black paint to hide the edge of the hair. I used cleat satin varnish as hair spray on the hair, which helped to keep it uniform, and kinda glued the loose pieces together.
The teeth come out slightly yellow after you bake the translucent sculpey. The more you bake it the yellower,browner, and darker they will get. I washed these with a light wash of raw umber, a yellowish brown, then mixed in some red with the wash and touched up the areas where teeth are broken.
I used Krylon Crystal Clear Gloss to seal the face and inside the mouth to give it that wet look, and then used satin on the skin followed by a dusting of matte.

 Cauldron Creep 3.0 How-To
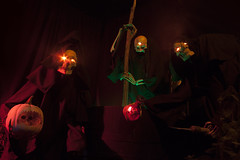 The Witches of ScabTree Hollow
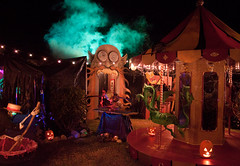 Rasputin's Carnival of Risk
 Haunted Tiki Island