Tuesday, August 25, 2009
Wacky Zombie - Part 1. The Noggin
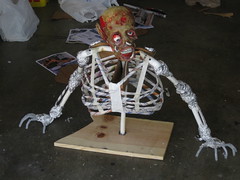
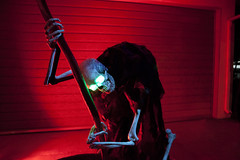
This is the Wacky Zombie, aka. the "Wheel Barrow Zombie". I built this for a friend who wanted a fun looking corpse who would be getting wheeled back to the grave from whence he came. He wanted to be able to pose the legs and wanted the arms to be marionette style, since he plans on making a little video clip of him to go in the haunt. Oh yeah he needed to be blue.
Building the Head
I had a bunch of foam castings of a bucky skull with the jaw attached from last year that were kinda last minute filler props, so I decided to recycle one. For this project, you can use any skull you might have. If you have a two-peice skull with the separate jaw you gold, if your like me, you have to cut the jaw off.
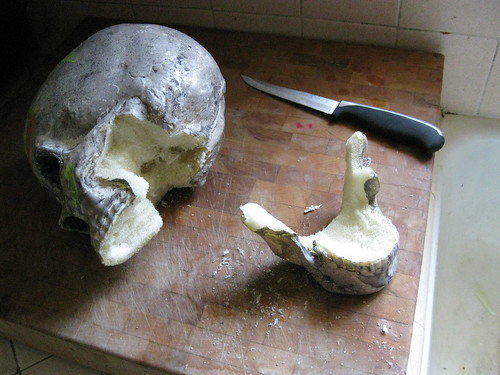
I have carved out the jaw part after removing it from the skull to give it a more realistic shape.
Word to the wise, some foam can make a huge mess (plus urethans foam is toxic). I carve it over the sink, and then wash the nasty dust down the drain after I pull out the big chunks.
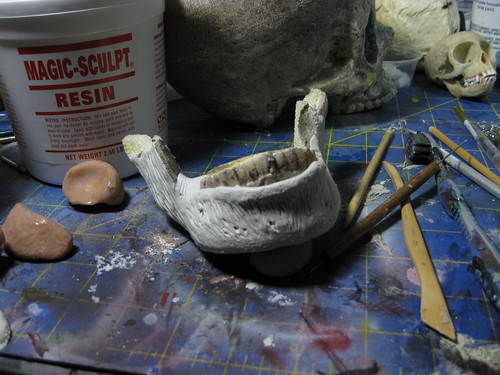
Now is the time to build up the inside of the mouth with clay, before you put the face together. I made a soft pallete, a tongue, and sculpted the outside skin while I was at it. You'll see the teeth from the foam skull are still in this shot, but I took them out later, but you should go ahead and cut out the front 6 teeth or so. We are going replace them later with some hand made sculpey teeth. I sculpted this with Magic Sculpt (very much like Apoxie Sculpt), which is a slow drying epoxy putty that you can sculpt and smooth with water. It smells pleasant and dries hard in about 3 hours. If you want to use Creative Paperclay, that will work nicely too.
The Teeth
The teeth are made from Fimo Polymer Clay colors Translucent White and Yellow, which by the way are UV reactive. Making the teeth is very simple. Mix the White Translucent Fimo with the Yellow fimo to a ratio of about 10:1. Mix it together good or you will have swirly teeth patterns.
Now take a small piece and roll it out like this into a fat worm. To taper the Fimo, just roll out the edges with your fingers.
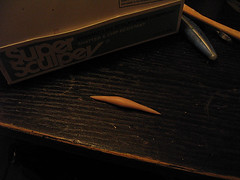
Then cut the little worm in half. You'll see how that tend to flatten the edge. Press that edge down of your tool didn't flatten it enough as you cut it. Then just make 3 or 4 vertical lines running down one side of the tooth and thats it. Bake these at 200° for 15 minutes. That's less than what the Fimo packaging will say, but these will be so thin it becomes easy to burn them, so we are going to cook them low n slow.
The Eyes
This guy has some custom eyeballs.
You can see then with the lights on, but when they are lit up in the dark they aren't too opaque that they are dark or look uneven. That because these are painted with an airbrush just dark enough to be see in light, but not so dark as to blot out the LEDs, or to create a giant iris as you might get with eyeballs painted with a brush. You can get the same effect using s airbrush, but you need to use translucent paint for the iris and keep your brush strokes very consistent.
I used these eyeballs that you can find in the stores around halloween as a party favor. They are too big for realistically proportioned eyes, but are good for an over the top theatrical look. I have just wet sanded the paint of with 600 grit wet/dry sandpaper. The sanding gives you a good surface to paint on as opposed the eyeballs very shiny finish.
I have drilled a whole straight back into each of the eye sockets, and then a hole straight up from where the spine would connect. I threaded the wire thru and have solders in the two ultra bright white LEDs. You can see I have some plumber's epoxy ( or JB Weld).
You can see there is a wad of plumbers epoxy I have wrapped around the wire. This is going to hold the LEDs in place so that they point straight out of the eye socket to evenly illuminate the eyeball, and will prevent them from slipping backwards into the head.
Heres what it looks like when its done. Nice and neat, properly seated and secure.
Here you can see that his eyes are lit evenly and bright, but you can still see the eye detail.
Sculpting and Corpsing the Face
I have skinned the face with Magic Sculpt, built up some eyebrows, added some rotten patches of skin on the top of the skull, and added some warts and such. Mostly I have tried to make a muscle pattern with lines following the contours of the face. In some place I have added some holes and wrinkles to break it up and look more rotten.
I made the ears with a different material called Super Sculpey Firm. I used the firm sculpey because It is much stiffer and will hold its shape in my warm Southern California apartment. At first I made ears that were symmetrical, but it made my zombie look like a chimp, so I re-did one ear to look shriveled like a dried apricot.
Here I got carried away and forgot to snap a few pictures. I have installed the eyeballs, and make eyelids out of Magic Sculpt to hold them in and seal off any stray light form the LEDs.
I have taken an old stock and pulled it over the head. I pulled it tight and cut off the excess stocking, then went and pinched little bits of fabric and cut them off which made all the little holes.
I painted the stocking white with thick acrylic (you can use latex, or latex paint too) which made it much heavier and sturdy, and also acts like a glue to hold the stocking in place.
After the paint dried, I took a awl like tool and pulled apart some of the fabric to add smaller details to the stocking.
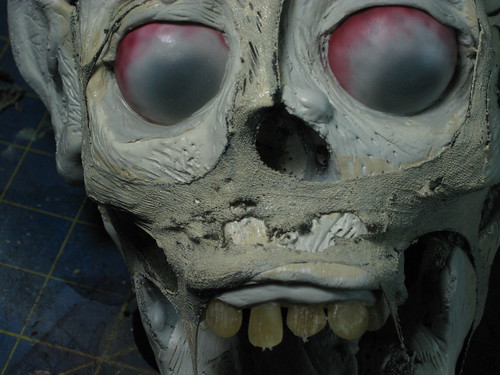
Then I smeared on some Greatstuff with a folded up piece of newspaper (why waste a brush?). This gives it a thinner coating and make smaller and more varied bumps.
Friday, August 21, 2009
Cauldron Creep How-To
This is my first, and so far only moving prop, the Cauldron Creep. It is very simple as far as the construction goes, it's just the idea that's a bit different. You don't need to use a skeleton, you can make it be anything as long as you remember that what makes it look real is that one arm never moves, and the other arm is totally loose like a marionette.
Check him out in action last year:
Watch this video closely and you should be able to figure out what's going on:
Parts List:
20 ft 1/2" PVC
8 1/2" PVC "T"s
4 1/2" PVC 90°
1 5rpm motor (for head action)
1 Monsterguts Wiper motor
2 ultrabright LEDs
Red and Black electrical wire small gauge
2 monsterguts eyball blanks
1 foam skull
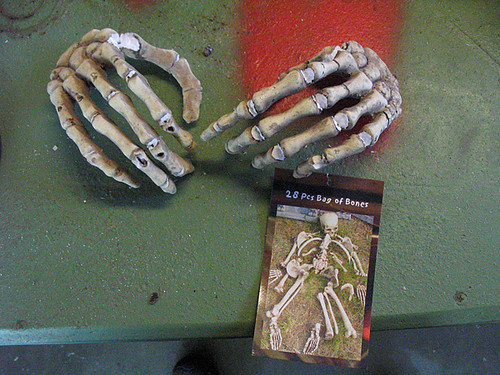
1 large "bag of Bones" from biglots
Creepy Cloth
1 can Greatstuff
1 can Black spray paint
1" drywall screws
5' 2x4
plumbers tape
ATX power supply
The Frame
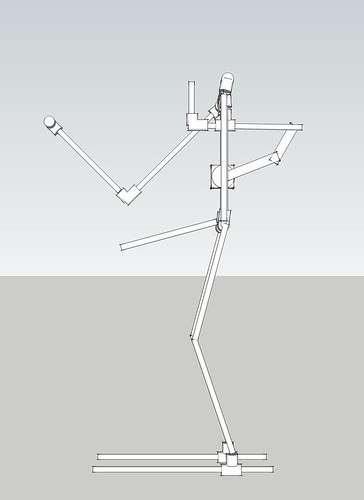
I made a model of this in Google Sketchup 7. You can download it here if you want to look at it in 3-D. This illustration just shows the construction. It is not to scale, and the measurements used were just guessed, but i shows you what's going on inside.
The frame is flimsy old 1/2" PVC pipe. I chose 1/2" PVC because (1.) I wanted it to be small since I was gluing bones to it, and I didn't want it to show up too much, and (2.) I thought it would have some give and kind of shake my skeleton a bit as the stick turned around. An added bonus is that it creaks, which lends itself to it being a creaky old skeleton.
The Arms
I am using the "Bag of Bones" from Biglots, it has a lot of pieces and is affordable ($20). These are painted styrofoam with wire armatures inside of them. They look good and are very light, but be careful, they are easy to melt when using a glue gun. Set your glue gun to low to make sure you are gluing and not melting.
The Marionette Arm
The free moving arm, that is in the lower position, and is the bottom hand on the stick is a marionette arm. This means the joints are loose and flop around freely. You might think that you could just tie some string between the bones and be done, but this makes for a joint that is too free, and will flop wildly. You can see in the picture below I have two connections made from armature wire. This lets the arm bend in and out as the stick circles in the cauldron, but keeps the arms from flipping over. You'll have to practice making this joint a few times depending on what you use to make the arms.
The hand joint is much simpler, as it has one looped connection the forearm.
The Rigid Arm
The rigid arm is very simple. Save for the wrist, the arm doesn't move at all. This arm supports the most of the weight of the stick, so make sure you set your PVC with screws so that it can't slide out of place. Where the hand connects to the wrist is just a simple connection like the hand for the marionette arm. To prevent mechanical binding, you might even use two loops of plastic coated wire.
The Hands
The hands bring this illusion together. To give them the solid look and to prevent shifting and/or binding, hotglue the hands in place to the stick. Tape the hand on the marionette arm in place first and let the stick turn for a few minutes, you want to make sure the arm doesn't get pulled straight all the way out, this seems to invite binding to occur. Lower or raise the lower hand on the marionette arm so that the overall position of the arm is mostly bent throughout the arc of travel.
The Cauldron
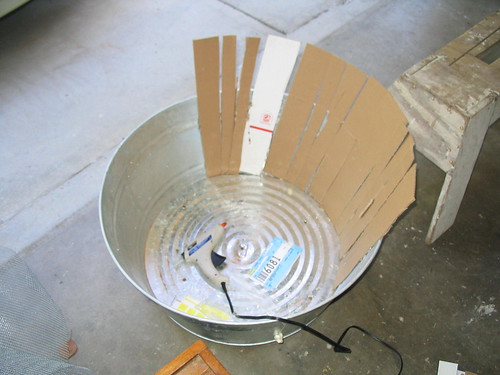
Here is an overview of the cauldron. I started with a metal wash tub (like you fill with sodas and beer for your summer BBQs). I built up the sides with cardboard, which i then covered with muslin attached with spray adhesive and went over with latex paint and Greatstuff.
Here is a sketchup rendering of what the cauldron looks like. The rotating arm is 1/8" aluminum bar stock. I attached a 1" pvc end cap to the end with a 5/16 bolt and nut. I filled the end of the PVC end cap with hot glue until the bolt head of the 5/16 bolt was covered and the bottom of the cap was flat and smooth. The nut should be on the underside of the bar stock, and not inside the PVC end cap. If I hadn't done that, the end of the stick would catch the bolt head and bind as it turned. This way the tip of the stick rotates freely as needed.
View from the bottom: That "H" is where the steel tub is screwed onto the frame. The Monsterguts wiper motor is held down by copper plumbers tape, and then screwed down into the wood from above. The "feet" of the skeleton frame are also attached here. This gives the whole piece much needed structural integrity. If the skeleton was standing separate, the stick would push him away from the cauldron over time, and eventually knock him over.
See that hole in the bottom of the tub? Thats where a plastic "pool" or sump hose goes to pipe fog into the cauldron. I just use a fogger with a timer to puff fog into it, something like 5 seconds on at 15-20 second intervals.
Head Mechanism
The head mechanism in my creep is very sloppy, but easy to understand and implement properly when you build yours.
This is what mine looks like: It is driven by a 5 rpm motor from allelectronics.com. The motor is driven off of the 12v output from an ATX power supply. The leads are hard to get to. You have to open up the case of the motor to solder leads onto the hookups, or carefully cut away the plastic housing with a dremel.
The linkage is two parts. One is a piece of bar stock that is attached to the spindle on the motor. That attaches to another piece of bar stock in a joint connected with a 5/16 bolt, two washers, and a nut. Then the other end of the second piece of bar stock connects the PVC lever coming out of the back of the neck assembly. Here it is again connected with a 5/16 bolt, washers, and a nut.
Mounting the motor so that the linkage aligns with the neck is done by cutting two small pieces of PVC, about 1-2" to make spacers. Then these are placed between the motor and the right hand side "spinal column" and a 4" drywall screw goes thru each of the motor's mounting holes and into the column.
You can see the two pieces of bar stock are very long, but that's because I mounted the motor too far from the head. If you bring the two ends closer together (the motor closer to the head) the axis will shrink. If I hadn't been rushing to finish this guy last year I would have futzed around with it more, and still might change it this year.
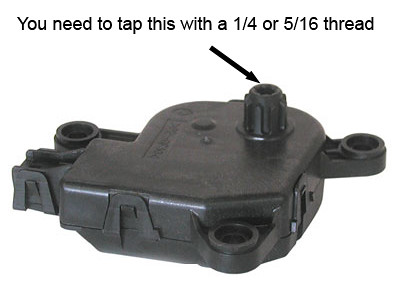
The motor has a very weird and specific connection. Don't be frustrated, just grab a 5/16 or 1/4 bolt and either (1.) screw it into the plastic, making your own threads as you go with questionable results like I did. or (2.) use a thread and tap tool to cut the plastic out.
Here is example what it should look like when you get right. This should get you in the ballpark, and then you can adjust as needed:
I based this mechanism off of Woody Carr's oscillating witch neck.. It's kind of a sideways version.
Here is a great site explaining the how this and other useful mechanisms work. I recommend bookmarking it ASAP.
Finishing Touches
To wrap it up I'll got over a few items here I have been asked about.
The Eyes: I used two eyeball blanks from www.monsterguts.com. I placed them in front of the two ultra-bright LEDs I used for the eyes, I mounted them with hot glue. When you shine the LED thru the whole eye is gets very soft creepy glow. If you want more focused eyes, with a bright white pupil/iris, try drilling out a whole in the back of the eyeball blank.
Connecting the eyes: Check out this little info nugget from Scary Terry first. To power the eyes, you are going to run them off the 3.3v output from the ATX power supply. Because this output is so close to the amount of voltage needed to run the LEDs, you wont need a resistor, but because it is just enough voltage to run one LED, you need to wire these in parallel and not in series. Each LED gets its own connection to the power source. So run a red wire from the LED to one of the 3.3v outputs on the ATX. You can connect both LEDs to the output, but they each need their own connection to the output, this is called "parallel" wiring. For the ground wire, your gonna run a wire down to one of the outputs labeled common (aka ground). Just like the powered lead you did with the red wire, you;ll have to run two black wires to the common (ground).
The Skull: The skull I used is a urethane foam casting I made from a Bucky 1st quality skull. Lindberg skulls also look nice but consider the weight. Try using a foam skull if you can to keep it light. A Bucky or Lindberg skull might be too heavy, so be prepared to use a sturdier motor.
The Stick: I just used a stick I found in the woods. I say use a real stick because the one I used is pretty heavy and I think it has a big influence on how the movement turns out. Some other stirring witch tutorials have light weight foam sticks which might work or not.
The Bones: As I mentioned earlier I used the big "Bag of Bones" from BigLots that runs for about $20 dollars. After I assembled the creep and had him working, I spray painted the frame matte black. I used a glue gun set to low heat and glued the foam bones directly onto the frame. Where I didn't have things like ankle bones or knee caps, I made them out of little globs of great stuff and painted them to match.
The Ribcage: Mine is total crap. it's great stuff on hardware cloth. DON'T USE HARDWARE CLOTH! Its too rigid and cuts your hands up. I think a newspaper ribcage (like the picture below) should work out fine. All you need to watch out for is the mechanism catching in your ribcage.
Remember to use creepy cloth to cover up the shortcomings of your skeleton!
If you have any questions, just post them to this thread over on Hauntforum.
Resources:
Monsterguts.com
AllElectronics.com
Mechanisms
Woody Carr's Witch How-to
Scary Terrys Wiper Motor Page
Scary Terry's using and ATX power supply page
Google SketchUp
DC's 3-d file of the Cauldron Creep frame
Wednesday, August 19, 2009
FrankenPaint Pt.4
Just one last installment of the FrankenPaint series. In this segment you can see how the pimple like boils in the upper left of the face were done.
Friday, August 14, 2009
2 - Part Silicone Mold How-To
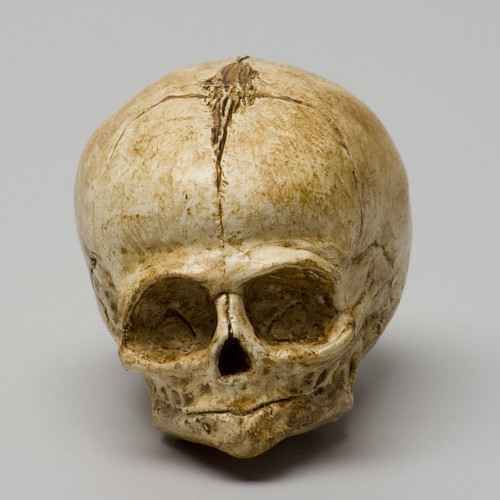
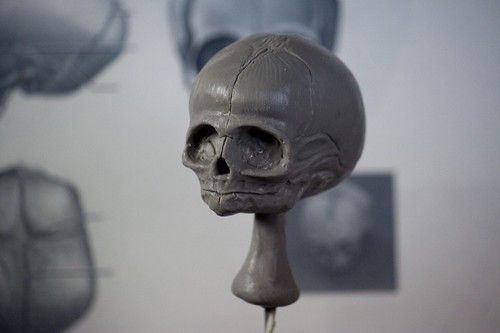
I made this small fetal skull for a FCG type prop I am making this year for Halloween. I am building an altar that will have three floating skulls cast in amber resin with flickering leds inside. Instead of spending $70 for a replica skull I thought I'd try and improve my sculpting skills by making this myself. This is just super sclupey 3. That weird looking neck is just a pour spout I sculpted onto the bottom. It will be cut off the castings.
We will be building this mold with SmoothOn Dragon Skin brush on silicone. The actual mold will be very thin and will collapse or flop around under it's own weight. To prevent this and to make sure the mold holds it shape, we need to build a rigid support shell which will also be covered in this how to.
Building the Mold
Part One - The Model Support
To start making this two peice mold you need to build a support platform which will hold your original very steady and will create the foundation for the first half of the 2 part mold. You want to use something that is affordable, compatiable, and esy to work with. Plasticine, plastina, or oil based clay works well and is commonly used for this application. Be sure that your use a sulphur free clay, as sulphur inhibits the cure of the silicone we are going to be using.
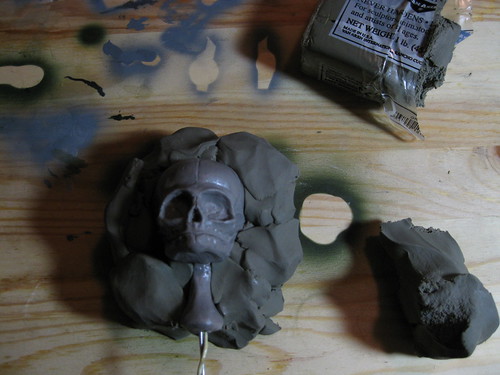
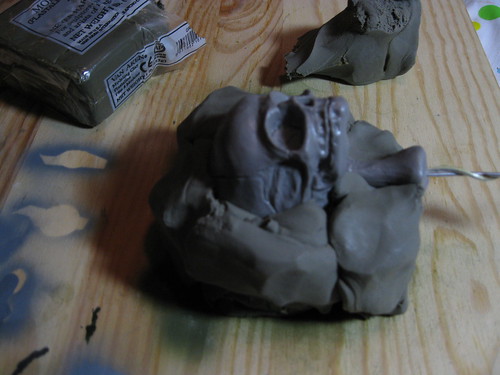
First you want to set your orginal down in a small wad of clay, and push it firmly so that is sticks. Then you want to start building up around edge to increase the size of the support.
You can see here that I am just pushing clumps of clay around the edges. The clay doesnt have to be solid and void free, it just has hold together (not crumble) and in the end, only the surface needs to be smooth.
Once you build up the support base so that it extends about 2-3 inches its time to start smoothing the top. This margin of 2-3 inches isn;t propportional, so even though this is a small mold, for a full sized skull, you could make yours 3-4 inches, but mauch larger will only make your mold cumbersome and use more material. The edge is there so that you can put bolts into the support shell to hold the mold shut.
Once you get the surface smooth over all, you want to go in and carefully smooth the area where the model meets the clay. This is the seam line, so the cleaner this area is the less you'll see it when you make castings.
After you clean up with tools, you'll want to use 90% alcohol and a small paintbrush and smooth the areas around the seamline until is very smooth.
Next we are going to take a small ribbon tool to remove a line of clay from just around the edge of the model. This prevents from resin leaking out of the mold in case the mold halves aren't always perfectly aligned or pressed together had enough at all times.
Then taking the end of paintbrush push in some holes around the perimeter just outside the resin trap line. These are the pin registers which will help keep the mold halves aligned. I made more than it needs because some will not come out right despite the best attempts to apply the silicone properly.
The heavier outside line you see is going to be the edge of the mold. The silicone will be trimmed to this edge, and the area round it will be for the support shell.
Here you can see I have added 4 large holes in the outer area. These will be pin registers for the support shell. Now spray it down with mold release or use a brush to smooth on a very thin coat of petroleum jelly. Make sure you get it in all the nooks and crannies.
Part Two - Silicone Mold
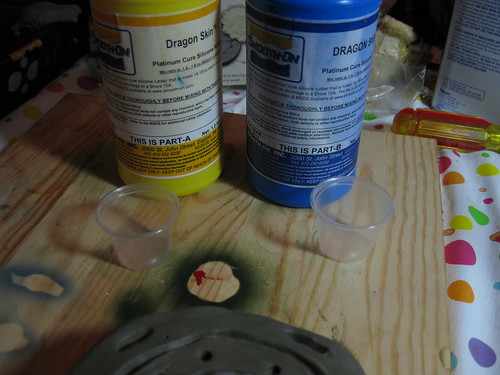
Now we are going to mix up some Dragon Skin silicone and start making the mold. I have two 1oz portion cups and a 2.5oz portion cup. We are going to use the 1oz cups to measure out the silicone and mix them in the 2.5oz cup. If you are making a bigger mold, just scale up the size of the portion cups. 2.5 oz cups work great for measuring silicone for full size skulls, and just use a small plastic cup to mix it up.
In the 2.5oz cup I put some red SilcPig silicone pigment.
Then measure out equal parts A and B of Dragon Skin.
Scrape all of the A and B into the 2.5oz cup and mix together scraping the sides and making sure the red pigment is mixed in completely.
The first coat is the detail coat. To make sure you capture the detail you want to "stab" on the silicone with a cheap brush and make sure you cover every nook and cranny.
To make the mold keyes we built into the clay work we need to drizzle silicone into the little holes in the lay around the head. Try not to get any bubbles in these. Poke them with a toopick and swirl it around gently to make sure it is filled with silicone. Then brush on the rest of the first batch of silicone with gentle strokes, being careful not to trap any air bubbles.
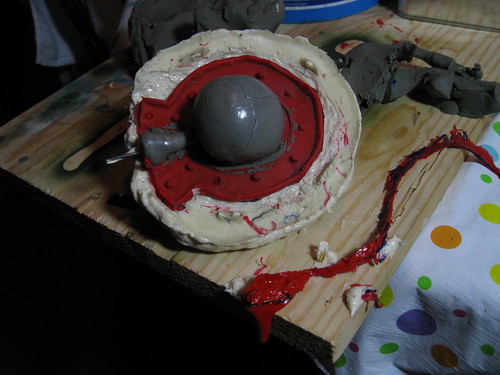
After the first coat cures or dries to a tacky finish (sticky but doesn't come off on your finger) it time to do the second coat. Now if you took a nap or had to go bail your brother out of jail and it cures completely, don't fret. The next coat will stick stick, but wont be as strong. probably not an issue for casual mold makers, but if agiant production house were your pulling casts all day and fast, it will wear faster.
In the second coat we are going to add some blue SilcPig to the silicone so that we can tell if we have covered the last coat completely. We are also going to add Thivex, a silicone thickener. Just a drop will do. THis will make the silicone very viscous. On this coat and the next we just want to build strength. So we're going to lay the silicone on thick brush or a plastic knife and just kinda trowel it on. Build it up around the eye sockets and nose, all of the highest points.
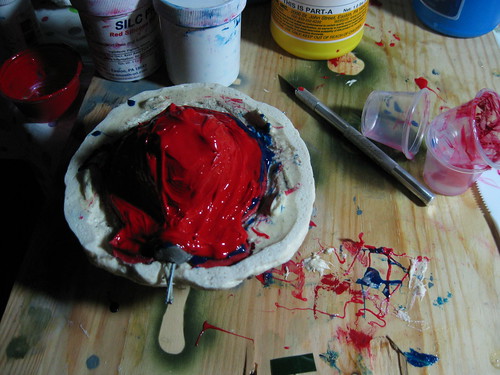
On this third coat, it's the same as the second, only we switch back to red SilcPig to make sure we cover it all. When it dries, pull off or snip off the stringy little bits of silicone that spilt over the side.
Part Three - The Support Shell
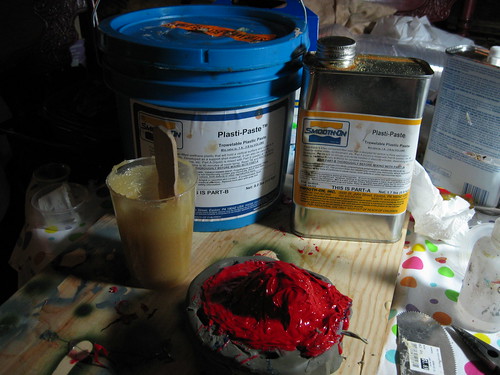
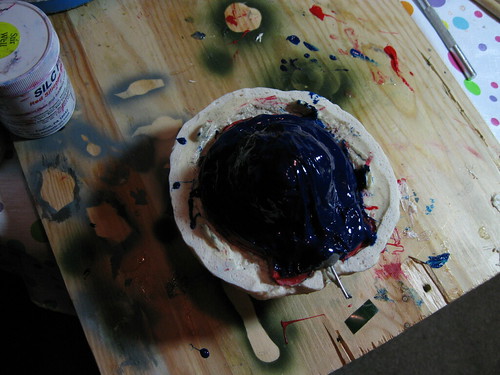
When the third coat of silicone is completely dry/cured we will build it support shell. I am going to use Smooth-On Plasti-Paste but you can also use fiberglass, plaster, or a brushable plastic. The Plasti-Paste is is a 3:1 ratio two part urethane plastic with fibre bits embedded into it. I mixed up 5 ounces, 4oz A and 1oz B.
Just trowel on the Plasti-Paste with a plastic knife. You want it to go all the way to the edges of the clay but not over. Make sure you push some into the holes you made in the clay for keying the support shell to its other half. When this dries, we going to pull off the clay. Don't pull the model out of the mold! Not even to peek.
I have pulled the support of clay off of the table, and then carefully pulled it away from the model and first half of the mold. There will be some clay you have to carefully remove stuck to parts.
I have cleaned off most of the clay. Until I took this picture I thought it was clean, but I still see a few bits by the pourstem and base of the skull. You can also see what happens when your keying holes dont get silicone in them. The third one up from the bottom had an air bubble, and is now useless.
I have also trimmed the mold with scissors to the line I made in the clay. The raised edge it made will form a trough for the silicone on the second half. and the second half will rest inside this edge, again helping to prevent any leaks from becoming messes outside the mold.
With the mold cleaned and the excess silicone trimmed away, this is what you should have. Before you start the next step, you need to really lay on the mold release. I have used spray for the model itself, and of rthe mold and and the support shell I used petroleum jelly, and made sure to really work it into all the crevices. Silicon like to stick to silicone, and the Plasti=Paste is even stickier!
The second half if the same as the first half. 1s coat detail coat. 2nd and 3rd coats are thick build ups for strength.
Once the 2nd half of the support shell has cured you can pry it apart carefully with a flathead screwdriver or aputty knife or evne a butterknife.
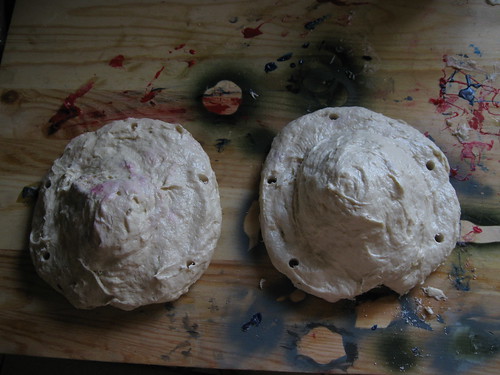
To hold the mold haves together we are going to use #20 bolts and wingnuts. To keep them aligned we need to drill them out in a certain way. Pull out the silicone inner mold halves and set them aside. Then take on of the halves and drill it out (liek the one on the right).
Then place the support shells together and use the first set of holes as guides. Drill thru them and then thru the other side. You should now have perfetly matched holes.
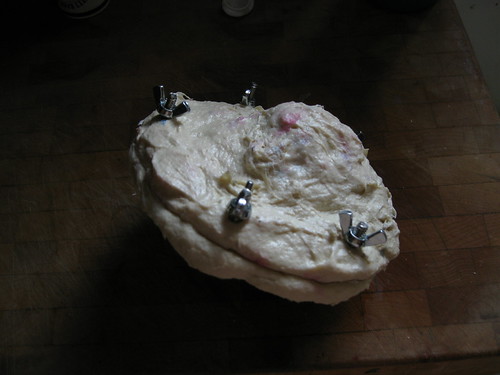
You should have a funny looking oyster when your done. Remember to only hand tighten these, and don't crank them down, just till they feel solid. If you go too hard, you'll break the shell.
Use a dremel or a file to clean up the support shell. You'll want to make sure to open up the area around where you'll pour the resin in. Any resin that spills will act like glue and weld your support shells shut. Trim off any of the shell that hangs over the edge ot the other half. This will make it easier to get the shells into alignment.
It always a good idea to keep the inside of the outer shells covered with a release agent.
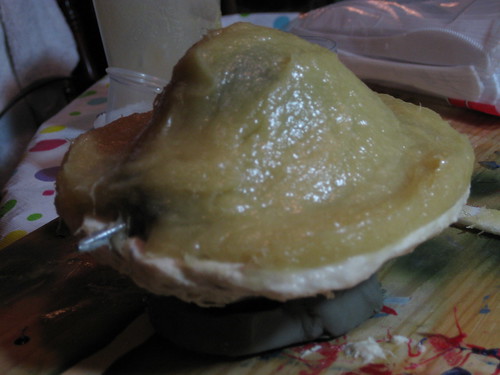
Some people like to make a plug for thier spout out of oil clay. I don't like to because it messy, waste clay, and I don't know that the clay wont alter the casting material or fall inside. So I made a little plug out of super sculpey 3 with a wire handle. You'll also notice to hold this mold upright I have it embedded in clay. I am going to be rotomolding these skulls, so I haven't given this support shell feet. You can easily add feet to the shell with some plumber epoxy aka JB Weld.
Just a shot of what the plug looks like.
Here is the first casting. I did it in white urethane plastic just to see how it would come out. You can see soem flash around the seamline, but it is so thin it rubs off with your fingers. A few passes with a fine emery board and its gone.
Here is the seam line. Not too bad, it will disappear unde some primer.
Just wash you cast very thouroughly with hot water and soap. Give it a good scrub and let it dry. It will be paint ready.
Subscribe to:
Posts (Atom)