
I made this small fetal skull for a FCG type prop I am making this year for Halloween. I am building an altar that will have three floating skulls cast in amber resin with flickering leds inside. Instead of spending $70 for a replica skull I thought I'd try and improve my sculpting skills by making this myself. This is just super sclupey 3. That weird looking neck is just a pour spout I sculpted onto the bottom. It will be cut off the castings.
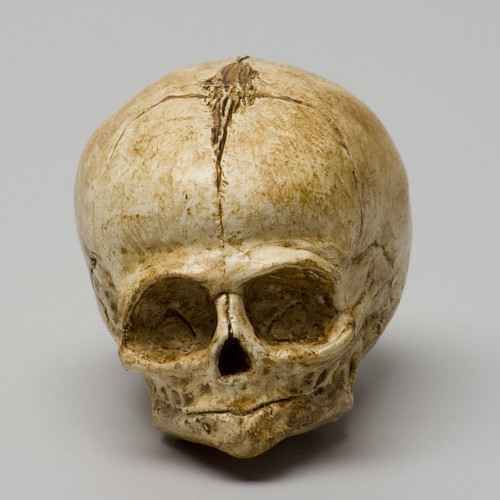
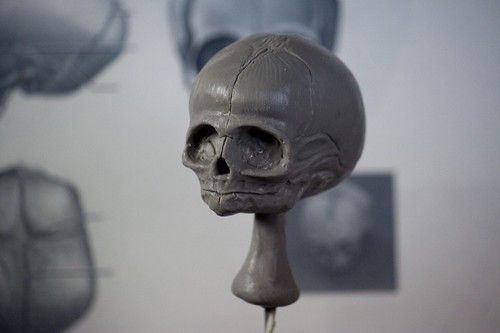
We will be building this mold with SmoothOn Dragon Skin brush on silicone. The actual mold will be very thin and will collapse or flop around under it's own weight. To prevent this and to make sure the mold holds it shape, we need to build a rigid support shell which will also be covered in this how to.
Building the Mold
Part One - The Model Support
To start making this two peice mold you need to build a support platform which will hold your original very steady and will create the foundation for the first half of the 2 part mold. You want to use something that is affordable, compatiable, and esy to work with. Plasticine, plastina, or oil based clay works well and is commonly used for this application. Be sure that your use a sulphur free clay, as sulphur inhibits the cure of the silicone we are going to be using.
First you want to set your orginal down in a small wad of clay, and push it firmly so that is sticks. Then you want to start building up around edge to increase the size of the support.
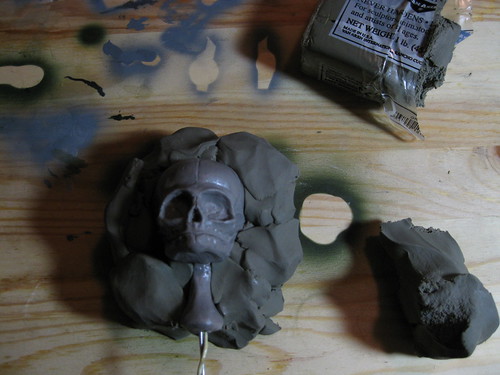
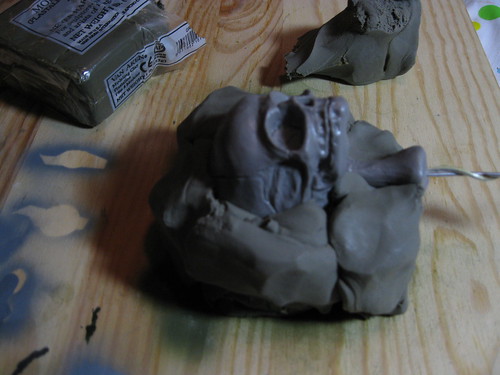
You can see here that I am just pushing clumps of clay around the edges. The clay doesnt have to be solid and void free, it just has hold together (not crumble) and in the end, only the surface needs to be smooth.

Once you build up the support base so that it extends about 2-3 inches its time to start smoothing the top. This margin of 2-3 inches isn;t propportional, so even though this is a small mold, for a full sized skull, you could make yours 3-4 inches, but mauch larger will only make your mold cumbersome and use more material. The edge is there so that you can put bolts into the support shell to hold the mold shut.

Once you get the surface smooth over all, you want to go in and carefully smooth the area where the model meets the clay. This is the seam line, so the cleaner this area is the less you'll see it when you make castings.

After you clean up with tools, you'll want to use 90% alcohol and a small paintbrush and smooth the areas around the seamline until is very smooth.

Next we are going to take a small ribbon tool to remove a line of clay from just around the edge of the model. This prevents from resin leaking out of the mold in case the mold halves aren't always perfectly aligned or pressed together had enough at all times.
Then taking the end of paintbrush push in some holes around the perimeter just outside the resin trap line. These are the pin registers which will help keep the mold halves aligned. I made more than it needs because some will not come out right despite the best attempts to apply the silicone properly.
The heavier outside line you see is going to be the edge of the mold. The silicone will be trimmed to this edge, and the area round it will be for the support shell.

Here you can see I have added 4 large holes in the outer area. These will be pin registers for the support shell. Now spray it down with mold release or use a brush to smooth on a very thin coat of petroleum jelly. Make sure you get it in all the nooks and crannies.
Part Two - Silicone Mold
Now we are going to mix up some Dragon Skin silicone and start making the mold. I have two 1oz portion cups and a 2.5oz portion cup. We are going to use the 1oz cups to measure out the silicone and mix them in the 2.5oz cup. If you are making a bigger mold, just scale up the size of the portion cups. 2.5 oz cups work great for measuring silicone for full size skulls, and just use a small plastic cup to mix it up.

In the 2.5oz cup I put some red SilcPig silicone pigment.
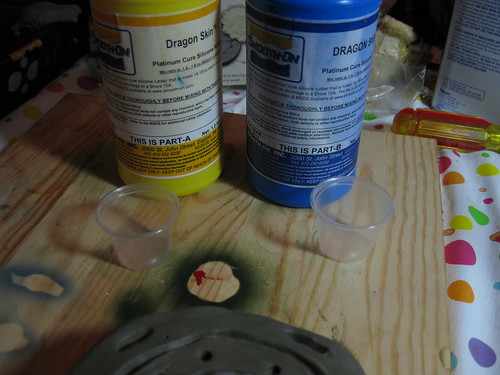
Then measure out equal parts A and B of Dragon Skin.

Scrape all of the A and B into the 2.5oz cup and mix together scraping the sides and making sure the red pigment is mixed in completely.

The first coat is the detail coat. To make sure you capture the detail you want to "stab" on the silicone with a cheap brush and make sure you cover every nook and cranny.

To make the mold keyes we built into the clay work we need to drizzle silicone into the little holes in the lay around the head. Try not to get any bubbles in these. Poke them with a toopick and swirl it around gently to make sure it is filled with silicone. Then brush on the rest of the first batch of silicone with gentle strokes, being careful not to trap any air bubbles.
After the first coat cures or dries to a tacky finish (sticky but doesn't come off on your finger) it time to do the second coat. Now if you took a nap or had to go bail your brother out of jail and it cures completely, don't fret. The next coat will stick stick, but wont be as strong. probably not an issue for casual mold makers, but if agiant production house were your pulling casts all day and fast, it will wear faster.

In the second coat we are going to add some blue SilcPig to the silicone so that we can tell if we have covered the last coat completely. We are also going to add Thivex, a silicone thickener. Just a drop will do. THis will make the silicone very viscous. On this coat and the next we just want to build strength. So we're going to lay the silicone on thick brush or a plastic knife and just kinda trowel it on. Build it up around the eye sockets and nose, all of the highest points.

On this third coat, it's the same as the second, only we switch back to red SilcPig to make sure we cover it all. When it dries, pull off or snip off the stringy little bits of silicone that spilt over the side.
Part Three - The Support Shell
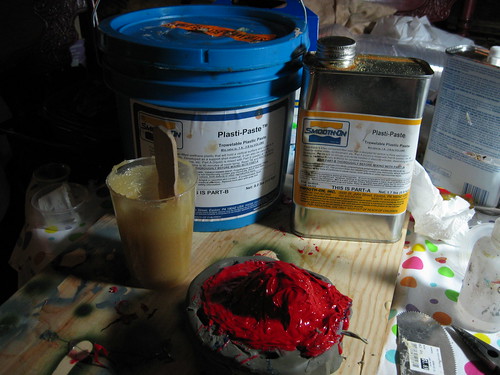
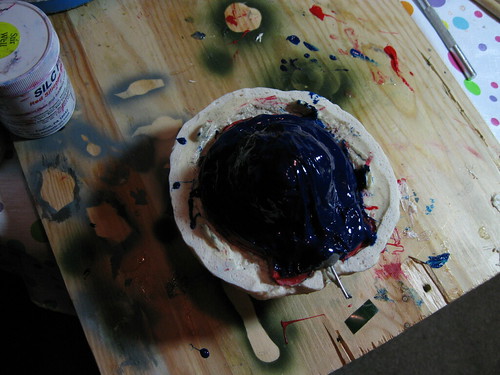
When the third coat of silicone is completely dry/cured we will build it support shell. I am going to use Smooth-On Plasti-Paste but you can also use fiberglass, plaster, or a brushable plastic. The Plasti-Paste is is a 3:1 ratio two part urethane plastic with fibre bits embedded into it. I mixed up 5 ounces, 4oz A and 1oz B.

Just trowel on the Plasti-Paste with a plastic knife. You want it to go all the way to the edges of the clay but not over. Make sure you push some into the holes you made in the clay for keying the support shell to its other half. When this dries, we going to pull off the clay. Don't pull the model out of the mold! Not even to peek.
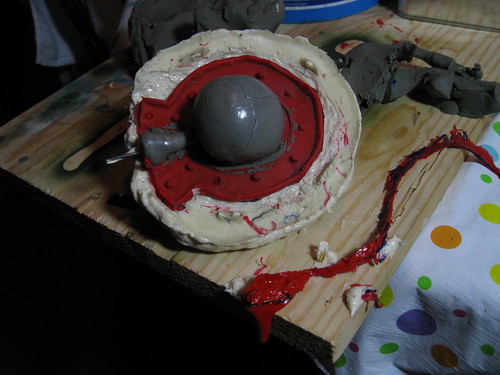
I have pulled the support of clay off of the table, and then carefully pulled it away from the model and first half of the mold. There will be some clay you have to carefully remove stuck to parts.

I have cleaned off most of the clay. Until I took this picture I thought it was clean, but I still see a few bits by the pourstem and base of the skull. You can also see what happens when your keying holes dont get silicone in them. The third one up from the bottom had an air bubble, and is now useless.
I have also trimmed the mold with scissors to the line I made in the clay. The raised edge it made will form a trough for the silicone on the second half. and the second half will rest inside this edge, again helping to prevent any leaks from becoming messes outside the mold.

With the mold cleaned and the excess silicone trimmed away, this is what you should have. Before you start the next step, you need to really lay on the mold release. I have used spray for the model itself, and of rthe mold and and the support shell I used petroleum jelly, and made sure to really work it into all the crevices. Silicon like to stick to silicone, and the Plasti=Paste is even stickier!
The second half if the same as the first half. 1s coat detail coat. 2nd and 3rd coats are thick build ups for strength.

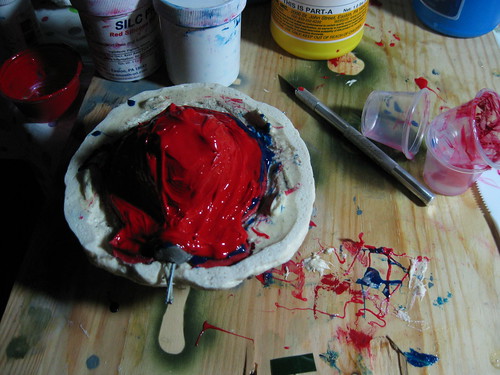
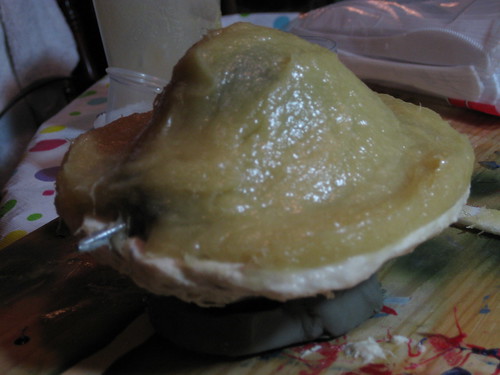
Once the 2nd half of the support shell has cured you can pry it apart carefully with a flathead screwdriver or aputty knife or evne a butterknife.

To hold the mold haves together we are going to use #20 bolts and wingnuts. To keep them aligned we need to drill them out in a certain way. Pull out the silicone inner mold halves and set them aside. Then take on of the halves and drill it out (liek the one on the right).
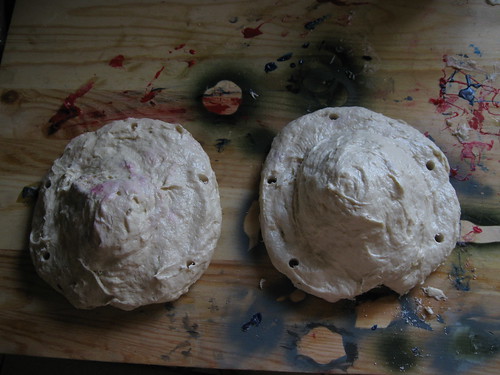
Then place the support shells together and use the first set of holes as guides. Drill thru them and then thru the other side. You should now have perfetly matched holes.
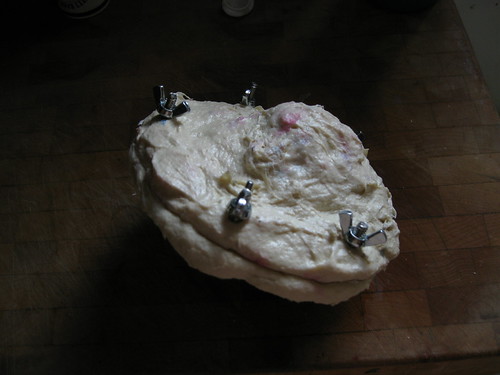
You should have a funny looking oyster when your done. Remember to only hand tighten these, and don't crank them down, just till they feel solid. If you go too hard, you'll break the shell.
Use a dremel or a file to clean up the support shell. You'll want to make sure to open up the area around where you'll pour the resin in. Any resin that spills will act like glue and weld your support shells shut. Trim off any of the shell that hangs over the edge ot the other half. This will make it easier to get the shells into alignment.
It always a good idea to keep the inside of the outer shells covered with a release agent.

Some people like to make a plug for thier spout out of oil clay. I don't like to because it messy, waste clay, and I don't know that the clay wont alter the casting material or fall inside. So I made a little plug out of super sculpey 3 with a wire handle. You'll also notice to hold this mold upright I have it embedded in clay. I am going to be rotomolding these skulls, so I haven't given this support shell feet. You can easily add feet to the shell with some plumber epoxy aka JB Weld.

Just a shot of what the plug looks like.

Here is the first casting. I did it in white urethane plastic just to see how it would come out. You can see soem flash around the seamline, but it is so thin it rubs off with your fingers. A few passes with a fine emery board and its gone.

Here is the seam line. Not too bad, it will disappear unde some primer.

Just wash you cast very thouroughly with hot water and soap. Give it a good scrub and let it dry. It will be paint ready.

Thank you for the easily understandable tutorial on making a silicone mold and it will totally help me in making a fiberglass helmet and a silicone keypad for my cellphone.
ReplyDeleteNo doubt this is an excellent post I got a lot of knowledge after reading good luck. Theme of blog is excellent there is almost everything to read, Brilliant post. plastic mold maker
ReplyDeleteRegular visits listed here are the easiest method to appreciate your energy, which is why why I am going to the website everyday, searching for new, interesting info. Many, thank you SAKURAI Mold Release Oil
ReplyDelete