Pages

Friday, September 26, 2014

Cauldron Creep 3.0 - Frame and Neck Motor Diagrams

One of the biggest improvements over the Cauldron Creep 1.0 was the new neck mechanism I created in Cauldron Creep 2.0. The new design is easy to build, fast to assemble and doesn't requires a giant hump to hide. I know, I KNOW...the hump is part of the charm, but I like medium sized humps.

The Frame


The frame is based of measurements from a Bucky 4th quality skeleton. Why is it important to mention it is 4th quality? 4th quality means you will have warped bones, poorly installed hardware, and who knows what else and this make them all kinda of unique in a way the would infuriate an engineer. So use the measurements for the legs and arm as guidelines, maybe add and inch or two for good measure then cut down as you fit the bones to the frame. (fitting bones to the frames will be in another post).

It's hard to see the details here so make sure to download the Cauldron Creep 3.0 How-To PDF.
The How-to is being updated as new sections are added, such as how to wire the led eyes, make costume, attach bones, etc. The link to the latest PDF of the How-To can be found here.

So here is an overview of what a cauldron creep looks like naked:


Neck Motor Mechanism


These plans are based on my current cauldron creeps version 2.0 and 3.0. Since I first made the Cauldron Creep in 2008 a few things have changed.


Firstly, the once cheap and widely available 6rpm window crank motors have become rare and pricey (up to $50). There is a substitute motor listed in the how-to parts list. This is a small geared motor that runs off of AC current. I have heard you can find DC current version of it, and if you can I recommend it. DC is much friendlier to beginners and hobbyist because the voltage are rarely high enough to be dangerous.

Secondly, the mechanism now is more compact and requires less bar stock (which is pricey). It is also easier to make and assemble. It doesn't require as large a back hump to operate.

The wood block is used as a mounting base for the motor as the mounting points on the motor didn't allow it to be aligned the frame centerline if mounted to the PVC pipe. It also creates a stand off which helps get the motor more to the center. Depending on what motor you end up using and the fittings associated with it you be able to figure out your own stand off and alignment needs.

You'll also see I used a 4 inch KO Test plug as part of the mechanism. I used it thinking it would reduce snagging or pinching. I recommend using a 2.5" to 3" piece of bars tock with one hole drilled and tapped if possible where the motor connects. Make sure the rotation of the motor tightens the threads as it turns. If you can't reverse the motor you'll have to mount it on the opposite side so it that it tightens threads instead of loosening them as it turns.

Here is a preview of what you'll find in the PDF.

This is a schematic of the neck motor assembly:


And the exploded view:


And the side view or the neck mechanism:


And finally a close up of the neck mechanism details:


Wednesday, September 17, 2014

Cauldron Creep 3.0 - Cauldron Diagrams

It's been hectic for the last few months and it's only going to get worse so I am trying to squeeze this into one afternoon.


I took pictures and measurements the last few times I made a cauldron creep. My creeps have been based off of the dimensions of the "Bucky" anatomical skeleton. If you have a costco/walgreens posable skeleton you have to make adjustments for the length to arms legs and torso height.

What I have managed to assemble here is the diagrams I had made for the neck mechanism and cauldron motor.

I tried to make them clear but you know how sometime you either over think it or because you know the subject so well you skip over important things. If you have question I'll try to answer them.

Here is the parts list for the cauldron motor assembly:


10” to 12” section of 3/8 in. W x 1/2 in. H Aluminum C-Channel with 1/16 in. Thick


2” to 3” PCV end cap
2 1” x 1.5” x 3” length of oak, walnut, or other hardwood
2 1” x 1.5” x 2.5” length of oak, walnut, or other hardwood
12” to 18” diameter circle of wood, mdf, or particle board
Plumbers Tape 3/4 in. Galvanized Steel Hanger Strap
Monsterguts.com Wiper Motor (or similar)
Monsterguts.com DC Motor/ LED Light Dimmer (option 1)
ATX power supply from computer (option 2)
1 ¼” drywall or wood screws
3” drywall or wood screws


Here are the diagrams high-res and easier to read tehn screenshots on a blog:


You will also want to learn how to find the center of a circle here or here.


The motor assembly in the cauldron. It consist of a windshield wiper motor, using the low power inputs from a 5.5v power source ( I use an ATX power supply from an old PC). This drives a piece of 3/8" U channel aluminum with a 2" PVC end cap bolted to the end. This is a cup that the stirring rod rest inside of. The stick is not attached to the motor base. To ensured that the stick doesn't bind while turning the PVC cap is filled with hot glue or a round insert of cardboard is placed inside. Sharpening the end of the stirring stick to a dull point will allow it to turn fore freely as well.

To make modifying or servicing the motor assembly or cauldron easier I have created a sandwich style construction. The motor is attached to a round cut out that rest inside the cauldron. It screws or bolts through the cauldron itself into a base underneath which has an "H" shaped riser to clear the ground and allow a pipe for fog and electronics and lights underneath.


Here you can see in pink that sliding rail system i devised for adjusting the creep in relation to the cauldron. It seems in practice you might want to make it longer and cut down to size instead of coming up short.


Again I'm short on time for blogging but I can answer questions so leave them in the comments.
I'll be working on the neck mechanism and update as soon as I can.


Thursday, June 19, 2014

Cauldron Creep 3.0 How To - Parts List


If I have sit down and do a cauldron creep how to all at once I am never going to get it done. Too Many other things I have committed to already so I keep putting it off. I know people want to get started on their Cauldron Creep projects so I am going to post this how to in installments.

Update: Download the latest Cauldron Creep 3.0 How-To here.

This is as complete as I can make. You may need a few extras of some bolts, nuts, screws, but this is 99% complete. The PVC lengths here are based on my cauldron creep revison in 2013 which roughly match the dimensions of a "Bucky" skeleton. From The SoCal Valley Haunters Group presentation in March 2014:


Parts list:


Stirring Assembly


10” to 12” section of 3/8 in. W x 1/2 in. H Aluminum C-Channel with 1/16 in. Thick
2” to 3” PCV end cap
2 1” x 1.5” x 3” length of oak, walnut, or other hardwood
2 1” x 1.5” x 2.5” length of oak, walnut, or other hardwood
12” to 18” diameter circle of wood, mdf, or particle board
Plumbers Tape 3/4 in. Galvanized Steel Hanger Strap
Monsterguts.com Wiper Motor (or similar)
Monsterguts.com DC Motor/ LED Light Dimmer (option 1)
ATX power supply from computer (option 2)
1 ¼” drywall or wood screws
3” drywall or wood screws


Cauldron Creep Body


Neck Mechanism


Locktite Thread Adhesive
6 ¼” nuts
1 ¾ by ¼” bolt (neck assembly)
1” by ¼ bolt (neck motor)
2 ¼” washers
4 2” x 10-32 bolts
2 1 ½” x 10-32 bolts
16 10-32 nuts
4’ KO Test Cap (or 4” circle of rigid material 1/16th to 1/8th thick, ABS plastic, Metal, etc)
9” Schedule 40 PVC ½ ID pipe : one 7” section, two 1” sections
1 Schedule 40 PVC ½”ID 4 way Cross
2 Schedule 40 PVC ½”ID 45˚ Elbow
5.5 “ section of 3/4 in Aluminum Flat Bar Stock with 1/8 in. thickness
1” x 1.5” x 7.75” length of oak, walnut, or other hardwood (also used in stirring mechanism)


2001-2008 Dodge Chrysler Heater And A/C Blend Door Actuator 12 volt 5rpm DC motor (now $25-$35 on ebay)

Robust AC Synchronous Motor 110V AC 5/6RPM Geared Motor CW/CCW Torque 4kg (about $5 on ebay)
1 Metric M4 threaded bolt for the AC Sync motor option


Head


2 Eye Ball blanks from Monsterguts.com or two roll-on deoderant balls from packaging.
2 Common Anode RGB LEDs Radio Shack SKU NUMBER:12760028
3 3 pin mini toggle switches
Electrical wire , red, black, and third color (I use green in my how-to)
thin sheet of plastic or metal (a grocery club card works)
heat shrink tubing or black electrical tape
Schedule 40 PVC ½”ID coupling
Gorilla Glue (must be gorilla glue, which is urethane expanding adhesive)
Plumbers/Epoxy putty


Body and PVC Frame


Schedule 40 PVC ½”ID pipe through out


2 23” lengths for the spine(s)
2 5.5” length for shoulder
2 5.5” length for pelvis
4 1” sections to connect legs and arms to torso
2 10.5” sections for upper arms
2 11.5” sections for forearms
2 28” sections for feet
6 T connectors
5 90˚ elbows
3 45˚ elbows
1 in. x 2 ft. x 10 ft. Poultry Netting
1 ¼” drywall or wood screws
Weed Shield Landscape fabric from Big Lots (it’s terrible for gardening but great for costumes)
spray adhesive
3 Size #2 ball bear cross lock fishing swivel ( for marionette arm at elbow and wrist joints)


Tools Needed:


Wire brush
Hot glue gun
Cordless drill
Drill bits
⅞ Paddle Bit
Driver bits
PVC cutter or saw
Soldering iron and solder
Socket Wrench set (including 10 mm socket)
Wire cutters/strippers
dremel with sanding drum


Friday, February 28, 2014

Creative Influences - The Haunters Part 2 - Krough


Krough from hauntforum.com or Kevin Rough of grimvisions.com in the real world was one of the haunters who inspired me most when I was starting out. His approach to prop making was haunt as fine art (in my observation). He wasn't just trying to fill the yard. He took paper clay and paint and monster mud and made carefully crafted monsters. Above is Lo Pan a brilliant monster mud creation that won the Monster Mud Mayhem contest on Haunt Forum in 2007. What makes this prop great is that is is a prop and a small set. This starts to create a small world around the prop with it's own mood and sense of location (is he down on the docks by the waters edge or sitting on a pile of coffins playing a farewell tune for the dead?). I have tried to incorporate this into my haunt by building sets around my props like the Carver Creep form 2009:


And now for the prop porn. Enjoy!


Thursday, February 27, 2014

Creative Influences - The Haunters Part 1 - DeadSpider

I started looking at DIY Halloween props back in 2004. I was living in a tiny apartment by myself and so I never built anything, but I kept looking every year in the fall. I eventually found hauntforum.com and that's when I started to get the worm. This is where I found the haunters that inspired me to start creating. I was going to list them all in this blog but after the first haunter I realized I will have to do one at a time.

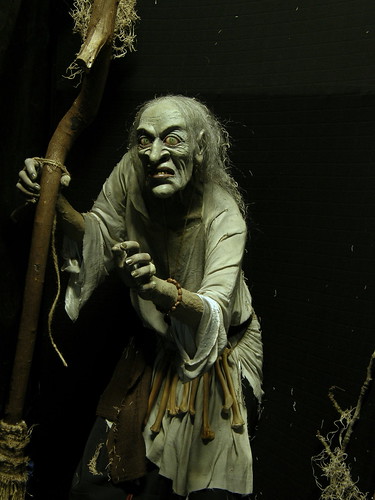
Dead Spider was one of the first home haunters who really inspired me. I loved her work. It was made from simple materials like paper clay and mache but had such a sophisticated and finished look. Angie's props are so well detailed, from hair and costume to paint and accessories. However, this one is my favorite.

Hemlock Dench was made for the Hauntforum $20 dollar prop contest in 2007 (also won 1st place).

I loved this prop so much that I can't help but think my entry in the 2008 $20 prop contest was influenced a bit. Wow, that picture might be too colorful.

DeadSpider has been participating in the Fright Fest BC event  Halloween in August . The pictures she takes and post on Flickr are awesome. Go check them out.


FrightFest BC 2012
FrightFest BC 2011
FrightFest BC 2010
FrightFest BC 2009

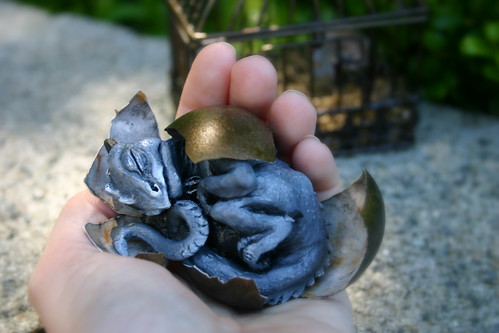
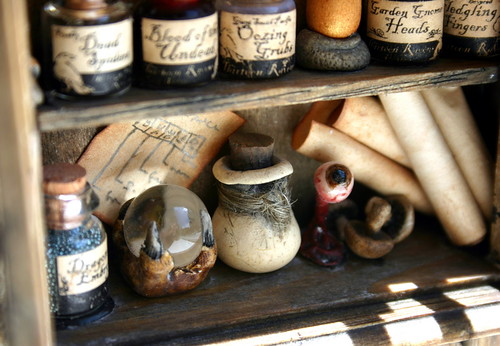
 She also has a great etsy shop where you can buy baby dragons, potion bottles, and other cool stuff.

I'm gonna stop talking and just post some of her prop porn. Enjoy!


Wednesday, February 26, 2014

Creative Influences - Tracking a Hero

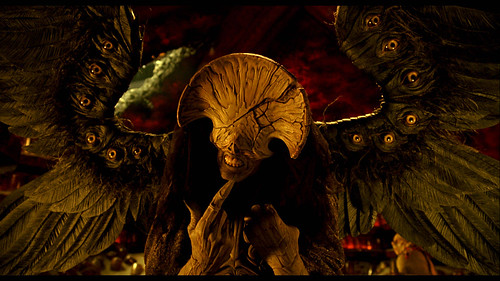
I built this guy in the summer of 2013. Named " The Watcher" he was the first part of the facless dead motif I had going in our new haunt theme The Witches of ScabTree Hollow. I got a lot of comments from people saying they liked him and that he reminded them of something from a Guillermo Del Toro movie. I don't at all disagree with that. In fact I bet you are thinking of this guy from Hellboy 2:


Which some of you will know looks like this guy:


Now there is a reason for this. This guy is a Wayne Barlowe creation. Wayne Barlowe works with Guillermo Del Toro. A lot of artists with Guillermo Del Toro. What might start as a sketch by Barlowe will get sculpted by someone else, that will get revised by Del Toro and maybe the digital art team, and then changed for executives and so on. So what you see in the final movie is the collaboration, sometimes as a team effort, sometimes it's a game of telephone.

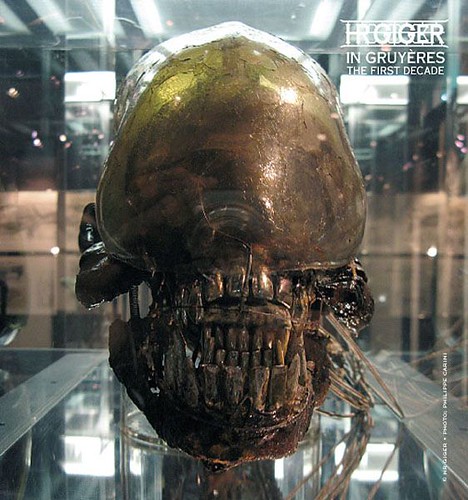
You can see the influence of Barlowe's Inferno and Brushfire images in The Watcher. The cryptogram on his face in influenced by Barlowe's runes which you can see in the above picture. The faceless look of The Watcher is most influenced by Alien creator H.R Giger.


You can see in the final Watcher he has a new head with no cryptogram. It's most like Giger's Alien. My favorite monster of all time. Giger's work in fact set the course of my life. It made me stop caring about cars, and clothes, and haircuts, and being cool. In a moment all I wanted to do with my life was make art. Haunting is the latest incarnation of my creative output but it's still inspired by the artists that influenced me so much when I was teenager.

Of course my first favorite monster was this guy from A Christmas Carol with George C. Scott:


So you take all of these influences, Giger, Barlowe, and the Ghost of Xmas Future and that how I came up with The Watcher. The arm movement is directly inspired by the reaper in the Christmas Carol. I still get goosebumps when this guy appears before Scrooge.

 Guillermo Del Toro is a lucky guy who gets to work with the artist he loves to create something new. You can too. Look for great artists and study their work. Don't worry about copying or being overtly influenced. There is nothing original in art, just new fusions of pre-existing work. Guillermo Del Toro's work is fusions of contemporary and classic artists. The Watcher is a fusion of Barlowe's Inferno, Giger's Alien, and a made for TV special grim reaper.

I started a pintrest page with some cool art by some of my favorite artists. Check out Beauty in the Darkness on pinterest.